

Introduction: Transforming Your Home with DIY Tile Flooring
Installing a tile floor can dramatically upgrade the look, feel, and value of your home. Whether you’re aiming for a sleek modern kitchen, a spa-like bathroom, or a durable entryway, tile offers versatility and longevity that few other materials can match. The prospect of tackling this project yourself might seem daunting, especially with so many design choices, material options, and technical steps involved. However, with careful planning, the right tools, a realistic budget, and a clear process, you can achieve professional-quality results and save significantly on labor costs.
This comprehensive guide will walk you through every step of the DIY tile floor installation journey, from initial budgeting and selecting materials to gathering essential tools and executing each stage with confidence. We’ll cover crucial details like preparing your subfloor, mastering tile cuts, ensuring proper alignment, and achieving flawless grout lines. Along the way, you’ll find practical tips for avoiding common pitfalls and ensuring your new tile floor stands the test of time. Let’s demystify the process and empower you to transform your living space with your own two hands.
Budgeting for Your Tile Floor Project
Understanding the Cost Factors
Before you buy your first tile, it’s essential to map out your budget. The total cost of a tile floor installation is influenced by several key factors:
- Tile Type & Quality: Prices vary widely, from basic ceramic ($1–$5 per sq. ft.) to premium porcelain ($3–$10 per sq. ft.) and natural stone ($5–$30+ per sq. ft.).
- Underlayment & Subfloor Preparation: Costs include cement backer board ($0.70–$2 per sq. ft.), leveling compounds, and moisture barriers if needed.
- Adhesives & Grout: Thin-set mortar (~$15–$35 per 50-lb bag) and grout (~$10–$30 per 10-lb box/bag).
- Tools & Supplies: If you don’t already own them, budgeting $60–$350 for tools is realistic. Renting specialty tools can save money.
- Waste & Overages: Add 10–15% extra tile for cuts, errors, and future repairs.
Sample Budget Breakdown (Per 100 sq. ft.)
- Tile: $200–$1,000
- Underlayment: $70–$200
- Adhesive & Grout: $50–$120
- Tools (purchase/rental): $80–$250
- Miscellaneous (spacers, buckets, knee pads): $30–$50
- Total Estimated Cost: $430–$1,620
Remember, costs can swing higher for premium materials or if subfloor repairs are needed. Always compare quotes, consider seasonal sales, and factor in local taxes or delivery fees.
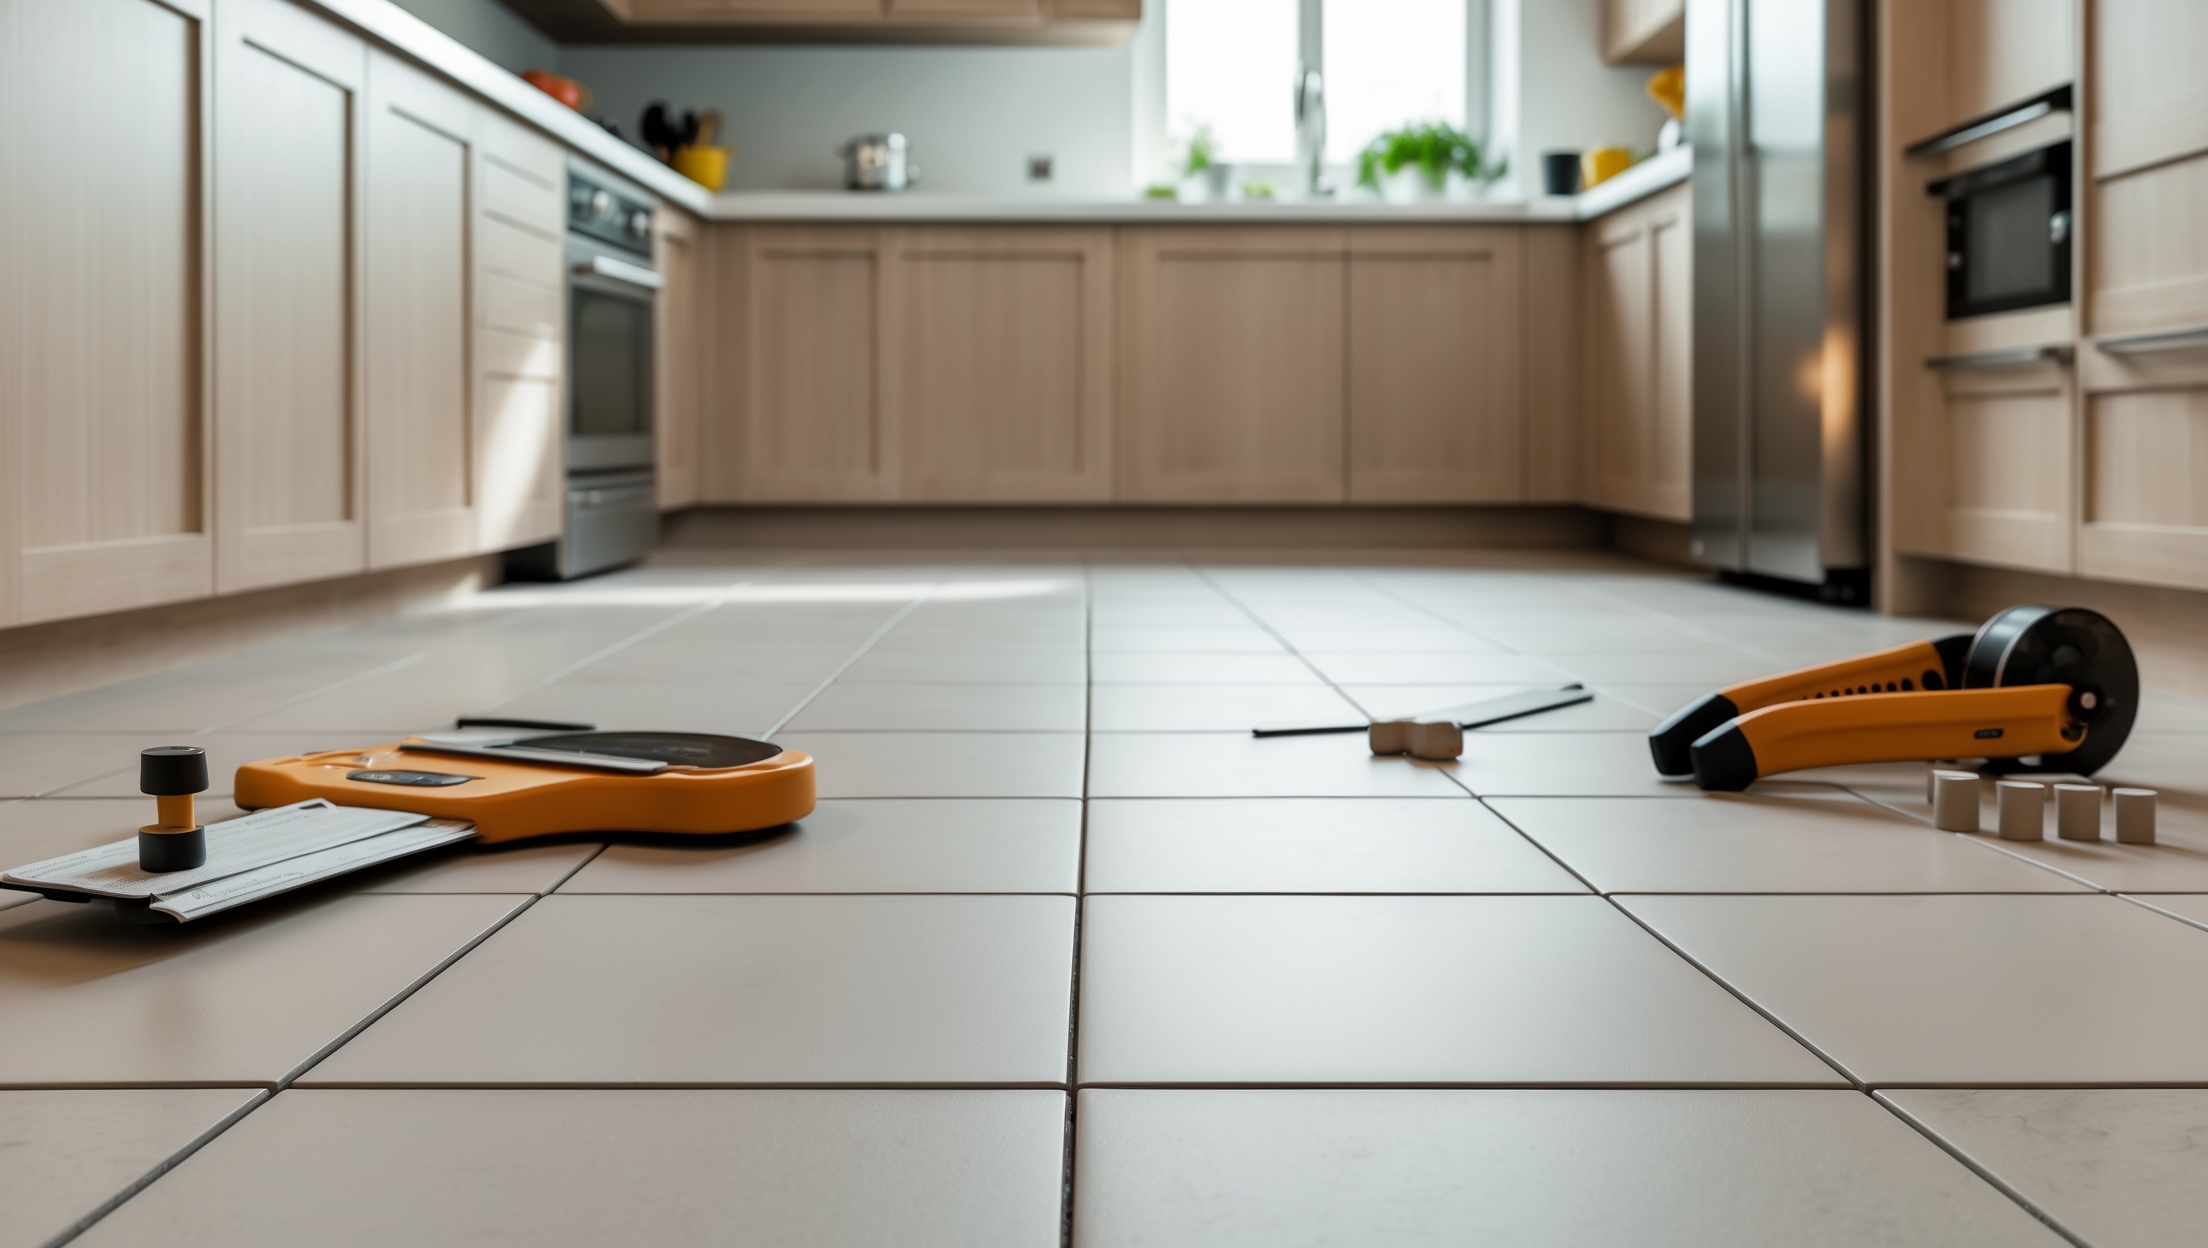
Essential Tools & Equipment Checklist
Having the right tools is vital for a smooth installation and professional finish. Here’s what you’ll need:
- Measuring & Marking: Tape measure, carpenter’s pencil, chalk line, square
- Cutting Tools: Manual tile cutter (for straight cuts), wet saw (for complex or stone cuts), nippers (for odd shapes)
- Installation Tools: Notched trowel, margin trowel, rubber mallet, tile spacers, tile leveling system (optional but recommended)
- Mixing & Spreading: Buckets, mixing paddle, drill (if mixing thin-set by machine)
- Grouting Tools: Rubber grout float, sponge, clean rags
- Subfloor Prep: Utility knife, screw gun, backer board scoring tool, level, straightedge
- Personal Safety: Knee pads, safety glasses, gloves, dust mask
Many home improvement stores offer tool rental programs for wet saws and specialty cutters, which can reduce upfront costs for one-time DIYers.
Step 1: Planning Your Layout and Selecting Materials
Measuring Your Space
Measure the length and width of the room at its widest points, and multiply to get the total square footage. Add 10–15% to your total for waste and future repairs. Consider obstacles like cabinets or islands, and account for them in your calculations.
Choosing the Right Tile
Select a tile suitable for your room’s function. Porcelain or glazed ceramic is ideal for bathrooms and kitchens due to water resistance. Stone tiles add luxury but require more maintenance. Consider slip resistance, color, size, and pattern. Larger tiles require fewer grout lines but may be harder to cut in tight spaces.
Deciding on Pattern & Layout
Common patterns include:
- Grid (Straight Lay): Easiest for beginners.
- Diagonal: Visually expands small spaces but requires more cuts.
- Brick/Bond: Offsets tiles for a classic look.
- Herringbone or Basketweave: Advanced patterns for added visual interest.
Dry-lay a few rows to visualize and adjust. Use a chalk line to mark the center of the room and lay out your first tiles from this point for symmetrical results.
Step 2: Prepping the Subfloor for Success
Assessing and Cleaning the Subfloor
A flawless tile job starts with a stable, level base. Remove old flooring and thoroughly clean away dust and debris. Inspect for damage—replace or repair any rotten wood or uneven concrete patches.
Installing Underlayment
For wood subfloors, install cement backer board with thin-set mortar and screws, staggering seams and leaving a 1/8″ gap between sheets. For concrete, ensure it’s dry, flat, and free of cracks. Use a self-leveling compound if needed. Always follow manufacturer recommendations for moisture barriers in wet areas.
Step 3: Laying and Cutting the Tiles
Mixing and Spreading Thin-Set Mortar
Mix thin-set mortar to a peanut butter-like consistency. Using a notched trowel, spread a small area at a time (about 3×3 feet). Comb the mortar with the notched edge to create ridges for better adhesion.
Setting the Tiles
- Press each tile firmly into the mortar, twisting slightly for full contact.
- Insert spacers between tiles for uniform grout lines (commonly 1/8″ or 3/16″).
- Check alignment frequently with a straightedge or level.
- Use a rubber mallet to gently tap tiles into place if needed.
Making Precise Cuts
Measure carefully and mark tiles to be cut. Use a manual cutter for straight cuts and a wet saw for notches, corners, or stone. Use nippers for small, irregular shapes around pipes. Always wear safety glasses and gloves when cutting.
Letting Tiles Set
Allow the mortar to cure for 24 hours before walking on the tiles or proceeding with grouting. Remove spacers once tiles are set.
Step 4: Grouting and Finishing Touches
Mixing and Applying Grout
Mix grout according to package instructions. Use a rubber float to press grout into the joints at a 45-degree angle, working in small sections. Remove excess grout from tile surfaces with the edge of the float.
Cleaning for a Professional Finish
- Wait 15–30 minutes after grouting, then wipe tiles with a damp sponge in a circular motion to remove haze, rinsing the sponge frequently.
- Allow grout to cure as directed (usually 24–72 hours).
- Buff away any remaining haze with a soft, dry cloth.
Sealing Grout (If Needed)
Some grouts require sealing to prevent stains and moisture penetration. Apply grout sealer with a small applicator bottle or brush, following manufacturer instructions. Allow adequate drying time before regular use.
Maintenance Best Practices for Lasting Beauty
- Regular Cleaning: Sweep or vacuum frequently to prevent grit from scratching the tile surface. Mop with a pH-neutral cleaner—avoid harsh chemicals.
- Grout Care: Wipe spills promptly, and avoid letting water pool on the grout.
- Sealing: If you used a natural stone tile or unsealed grout, reapply sealer every 1–2 years.
- Inspect for Damage: Replace cracked tiles and repair grout as soon as possible to prevent water infiltration.
Safety Checklist: Protecting Yourself and Your Home
- Always wear safety glasses and a dust mask when cutting tiles or mixing powders.
- Use knee pads to prevent joint strain during extended floor work.
- Handle adhesives and grout in well-ventilated areas.
- Keep tools and materials out of reach of children and pets.
- Follow all manufacturer instructions for tools and materials.
Conclusion: Take Pride in Your DIY Tile Floor
Successfully installing your own tile floor is a rewarding accomplishment that adds value and character to your home. By carefully planning your budget, investing in the right tools, and following a methodical installation process, you can achieve the polished results typically reserved for professional contractors. The skills you develop—measuring, leveling, cutting, and grouting—will serve you well in future home improvement projects.
Remember that preparation is key: a solid, level subfloor and thoughtful layout will prevent issues down the road. Don’t rush—take the time to practice tricky cuts, double-check measurements, and allow adhesives and grout to cure fully. Maintenance is straightforward but essential to preserve your investment; regular cleaning and prompt repairs will keep your floor looking beautiful for decades. Most importantly, enjoy the process and take pride in the craftsmanship you bring to your living space. With each step, you’re not just improving your home—you’re building confidence and creating a space that reflects your personal style and care.
You talked about preparing the subfloor before tiling. If my subfloor is already pretty flat but a little squeaky, do I still need to use leveling compound or replace sections before starting?
If your subfloor is already mostly flat but has some squeaks, you may not need leveling compound unless there are noticeable dips or high spots. However, it’s a good idea to fix the squeaks first—usually by securing loose boards with screws. Only replace sections if there is damage or rot. Properly addressing these issues now will help your tile floor last longer and stay crack-free.
I noticed the article mentions renting specialty tools if you don’t already have them. Which specific tools are most important to rent rather than buy, especially for someone who only plans to do one tile project?
If you only plan on doing one tile project, it’s most practical to rent tools that are expensive and not used often. The most important tool to rent is a wet tile saw, since buying one can be costly and it’s only needed for precise cuts. You might also consider renting a tile cutter or a tile leveling system, depending on your project’s needs.
If I’m tackling this project over a weekend, how much actual working time should I expect to spend from start to finish, including subfloor prep, tile cutting, and grouting? I need to plan around family schedules.
For a typical weekend project covering a medium-sized room (about 100–150 square feet), expect around 12 to 16 hours of actual working time. This includes 2–4 hours for subfloor prep, 6–8 hours for laying and cutting tiles, and 3–4 hours for grouting. Remember, you’ll need to factor in drying times for adhesives and grout, so some periods will be waiting rather than hands-on work.
Can you elaborate on how long the entire DIY tile installation process tends to take for an average-sized kitchen, including drying times for adhesives and grout before the floor is ready for normal use?
For an average-sized kitchen, the full DIY tile installation process typically takes 3 to 4 days. You’ll spend a day preparing the floor and laying tiles, then wait 24 hours for the adhesive to cure. Grouting usually takes a few hours, but you’ll need another 24 hours for the grout to set. After that, it’s best to wait at least 48 hours before heavy foot traffic to ensure everything is fully cured.
Regarding grout and thin-set mortar, are there certain brands or types you recommend that are easier for DIYers to work with, especially when trying to achieve those flawless grout lines you mentioned?
For DIYers, pre-mixed grout and thin-set mortars are generally easier to use because they save time and reduce mixing errors. Brands like Mapei and Custom Building Products offer user-friendly options sold at most home improvement stores. Look for ‘non-sanded’ grout for narrow joints and ‘sanded’ for wider ones. For thin-set, the ‘versatile’ or ‘lightweight’ labels often indicate a smoother, easier application. Always read the packaging to ensure compatibility with your tile type.
Can you give more specifics on how to check if my existing subfloor is level enough for tile, and what signs would indicate I need to use a leveling compound before installation?
To check if your subfloor is level, place a long carpenter’s level or straightedge (at least 4 feet) on different areas of the floor. Look for gaps under the straightedge or points where it rocks. If you see gaps larger than 1/8 inch over 6 feet or obvious uneven spots, you should use a leveling compound. Other signs include squeaky or flexing areas, visible dips, or high spots. Address these issues before laying tile to prevent cracking or uneven installation.
I noticed the article talks about ensuring proper alignment and flawless grout lines. What are the most common mistakes first-time DIYers make during those steps, and how can I avoid them?
Common mistakes include not using tile spacers, which leads to uneven grout lines, and failing to check alignment as you go, causing crooked rows. To avoid these, always use spacers between tiles, and frequently use a level or straightedge to make sure tiles stay straight. Also, don’t rush spreading grout—wipe away excess before it dries to keep lines neat.
What are some common mistakes beginners make while aligning tiles or working with grout, and is there an easy way to fix them without redoing large sections of the floor?
A few common mistakes include uneven tile spacing, misaligned tiles, and letting grout dry on the tile surface, which can leave a haze. If tiles are slightly misaligned, you can gently adjust them before the adhesive sets. For grout issues like haze, using a damp sponge or a grout haze remover can help if addressed soon after grouting. For small spacing problems, you might be able to remove and reset individual tiles without redoing the whole floor.
Could you give some advice on how to estimate the right amount of grout and thin-set mortar for a medium-sized kitchen? I’m worried about buying either too much or too little for my space.
To estimate grout and thin-set mortar, measure your kitchen’s square footage by multiplying length by width. For most medium-sized kitchens, you’ll need about 25–35 pounds of thin-set mortar per 100 square feet. Grout needs depend on tile size and joint width, but for standard 12×12-inch tiles with 1/8-inch joints, a 25-pound bag of grout should cover around 200–250 square feet. Always buy a little extra (about 10%) to account for mistakes and waste.
Can you provide more details on the types of underlayment you recommend for kitchens versus bathrooms? I’m not sure if cement backer board is always necessary or if there are other good options.
For kitchens, cement backer board is a popular choice because it offers durability and moisture resistance, but uncoupling membranes like Ditra can also work well, especially over plywood subfloors. In bathrooms, where water exposure is higher, cement backer board or waterproof foam boards are best to prevent moisture damage. For both areas, avoid basic plywood as underlayment. The key is to use something moisture-resistant and stable, with waterproofing especially important in bathrooms.
You mention budgeting for cement backer board and other subfloor prep materials. If my current subfloor is plywood in decent condition, is backer board always necessary, or are there situations where I could skip it?
Cement backer board is generally recommended when installing tile over plywood because it provides a stable, moisture-resistant surface that helps prevent cracks. However, if your plywood is thick, securely fastened, and in excellent condition, and you’re using specific tile-rated adhesives, some experienced installers may skip backer board. Still, most manufacturers and pros advise using it for long-term durability and to meet warranty requirements. Skipping it could increase the risk of tile movement or cracks.
Could you clarify how much time each stage of the installation typically takes for a beginner? I’m trying to plan the project around my work schedule and want to avoid leaving my floor unfinished too long.
Absolutely, here’s a general timeline for a beginner: Preparing and cleaning the subfloor can take 2–4 hours. Dry-laying tiles for layout planning takes about 1–2 hours. Spreading adhesive and setting tiles is the most time-consuming—plan on 5–8 hours for a medium-sized room, spread over one or two days. Allow 24 hours for tiles to set before grouting, which itself takes 2–3 hours, plus another 24 hours for grout to cure before walking on the floor. Overall, it’s best to spread the project over a weekend and allow for curing times in your schedule.
Once the tile is installed and grouted, how long do I need to wait before moving furniture back onto the floor or walking on it normally? I want to plan around this so I don’t damage all my hard work.
After installing and grouting your tile floor, it’s best to wait at least 24 hours before walking on it lightly. For moving furniture back or regular use, allow 48 to 72 hours to ensure the grout fully cures and the tiles set properly. This helps prevent shifting or damage, preserving your installation efforts.
After finishing the tile and grout work, how long should I wait before moving furniture back into the room? Does the type of adhesive or grout chosen affect the curing time?
It’s best to wait at least 24 to 48 hours before moving furniture back onto newly tiled floors. Some adhesives and grouts may require longer curing times, especially if they’re modified or epoxy-based. Always check the manufacturer’s instructions on the specific products you used, as following their recommended curing times ensures the tiles and grout set properly and prevents any damage.
How much time does a typical DIY tile floor installation take for an average-sized kitchen, especially for someone tackling this project for the first time?
For a first-time DIYer, installing tile in an average-sized kitchen (about 150–200 square feet) usually takes around 2 to 4 days. This includes time for surface prep, laying out and cutting tiles, setting them, allowing the adhesive to cure, and grouting. If you work carefully and allow for drying times, you’ll likely need a weekend plus a day or two.
Could you go into more detail about what counts as an essential tool for first-time installers? I want to make sure I’m not missing anything critical before I get started, but I also don’t want to overspend.
For first-time tile installers, the absolute essentials are a notched trowel for spreading adhesive, a tile cutter or wet saw for cutting tiles, a level and tape measure to ensure accuracy, spacers for even grout lines, a rubber float for applying grout, a sponge for cleanup, and safety gear like gloves and goggles. Extra tools like tile nippers or knee pads can help but aren’t strictly necessary if you’re watching your budget.
When budgeting for a DIY tile floor, how do you handle unexpected costs like needing extra leveling compound or discovering subfloor issues? Does the article suggest a percentage to add as a cushion for surprises?
The article does recommend building in a financial cushion for unexpected costs such as extra leveling compound or subfloor repairs. It suggests adding about 10-20% to your total budget estimate to cover surprises. This buffer helps ensure you have enough funds if you run into hidden issues once you start removing flooring or prepping the subfloor.
With the tool costs ranging from $60 to $350, are there certain tools worth investing in versus just renting for a one-time project? Which ones make the biggest difference in the ease or quality of the installation?
For a one-time tile floor project, it’s often best to rent expensive tools like a wet saw, which can be costly to buy but are essential for clean cuts. Hand tools such as a notched trowel, tile spacers, and a rubber float are usually affordable and worth buying, as they provide better control and convenience. Renting the pricier, less frequently used tools will help manage costs without sacrificing quality.
The wide price range for natural stone tiles surprises me. Are there any hidden challenges or extra tools needed when working with natural stone compared to ceramic or porcelain tiles?
Natural stone tiles do come with some unique challenges compared to ceramic or porcelain. They are often heavier and can be more brittle, requiring careful handling and sometimes a stronger subfloor. You’ll likely need a wet saw with a diamond blade for precise cuts, as snap cutters usually won’t work. Also, natural stone needs to be sealed before and after grouting to prevent staining and damage. These factors can add to both the cost and the effort involved.
I noticed you mentioned renting specialty tools as an option to keep costs down. For a first-time DIYer, which tools are absolutely necessary to own versus ones that are okay to rent just for the project?
For a first-time DIY tile floor project, it’s best to own basics like a tape measure, utility knife, sponges, buckets, and a notched trowel. Specialty tools like a tile wet saw and tile cutter are usually better to rent since they’re more expensive and not often used after this type of project. Renting also ensures you get high-quality, well-maintained equipment just for the duration you need.
You mention that tool costs can range from $60 to $350 if I don’t have anything on hand. Can you break down which tools are truly essential for a small bathroom versus ones that are just ‘nice to have’?
For a small bathroom, the essential tools you’ll need include a tile cutter or wet saw, notched trowel, tile spacers, level, tape measure, rubber mallet, grout float, and a sponge. These are necessary for accurate cutting, placement, and finishing. Tools that are nice to have but not absolutely required are a tile nipper (for tricky cuts), knee pads (for comfort), and a mixing paddle for mortar. Focusing on the basics will help keep your costs down.
You mention budgeting for tools in the $60–$350 range. For someone doing this for the first time, which specific tools are truly essential to buy versus ones that could be rented just for the project?
For a first-time DIY tile floor project, essential tools to buy include a notched trowel, grout float, sponges, and a tile cutter (manual snap cutter for small jobs). Items like a wet saw, tile nippers, and mixing drill are often better to rent if you don’t plan to use them again soon, since they’re pricier and not always needed for future projects.
The article talks about different types of tile and the cost per square foot. Is there a big difference in how challenging it is to install porcelain versus ceramic for someone doing this for the first time?
Porcelain tiles are generally denser and harder than ceramic tiles, which can make them trickier to cut and install, especially for first-timers. You may need a stronger tile cutter or even a wet saw for porcelain, while ceramic tiles are a bit more forgiving. Otherwise, the basics of laying both types are quite similar—just be sure to use the right tools for the material you choose.
You mention that tile type and quality can really impact the total project cost. How can I decide if it’s worth paying extra for porcelain instead of basic ceramic in a high-traffic area like a hallway?
Porcelain tiles are generally denser, less porous, and more durable than basic ceramic tiles, making them better suited for high-traffic areas like hallways. While they cost more upfront, their resistance to wear, moisture, and chipping often means fewer repairs or replacements over time. If your hallway sees a lot of foot traffic, investing in porcelain could save you money and hassle in the long run.
If I’m sticking with basic ceramic tiles to control costs, are there certain tools I can skip or rent instead of buying outright? I’m trying to stay towards the lower end of that $60–$350 tool range mentioned.
Yes, you can definitely save by renting or skipping some tools. For basic ceramic tiles, consider renting a tile wet saw instead of buying one, since it’s often the most expensive tool and may not be needed again soon. You can also use a manual tile cutter for straight cuts, which is cheaper. Items like tile spacers, trowels, and sponges are inexpensive and worth buying. Avoid specialty tools unless your project has unique needs.
How long should I realistically expect the entire DIY tile floor project to take from start to finish for a 150 square foot space, assuming I can only work on weekends?
For a 150 square foot tile floor, if you’re working only on weekends, you should expect the project to take about three weekends. The first weekend can be devoted to preparing the surface and laying out tiles. The second weekend is usually spent on setting the tiles and letting them cure. The third weekend covers grouting, cleaning, and final touches. Drying times and your pace may affect the total time needed.
You mentioned the importance of subfloor preparation and possible costs for leveling compounds and moisture barriers. Can you explain how to tell if my subfloor needs extra prep before tiling, especially in older homes?
To check if your subfloor needs extra prep, look for uneven spots using a long level or straightedge—any dips or high areas over 1/8 inch in 6 feet may require leveling compound. Also, inspect for moisture by taping a plastic sheet to the floor for 24 hours; if condensation appears, a moisture barrier is recommended. In older homes, watch for loose boards, squeaks, or signs of water damage, as these should be fixed before tiling.
Once the tile and grout are installed, what are your recommendations for preventive maintenance to ensure the floor stands the test of time, especially in moisture-prone areas like bathrooms?
To protect your new tile floor, especially in bathrooms, regularly seal the grout to keep moisture out—ideally once a year. Wipe up spills promptly, and use bath mats to minimize water contact. Clean tiles with a pH-neutral cleaner and avoid harsh chemicals or abrasive tools. Keep an eye on grout lines for cracks or discoloration, addressing issues early to prevent water damage.
You mention a lot about getting the grout lines flawless. If I accidentally mess up a grout line or two, what’s the best way to fix them before everything sets permanently?
If you notice a grout line is uneven or messy, use a damp sponge to gently smooth and shape it while the grout is still fresh—typically within about 20–30 minutes of application. For larger corrections, you can use a grout float or a small tool to remove excess grout and reapply as needed. Try to catch and fix any issues before the grout starts to harden, as it becomes much harder to adjust once set.
You mentioned that labor cost savings can be significant when doing this project myself. Realistically, how much time should I set aside for a standard-sized kitchen floor, from start to finish, if I’m working solo on weekends?
For a standard-sized kitchen, you should plan for about 3 to 4 full weekends if you’re working solo. This includes removing old flooring, prepping the surface, laying tiles, allowing for adhesive and grout drying times, and finally sealing. If you’re new to tiling, give yourself extra time for careful measuring and cutting. Working at a steady pace without rushing will help ensure quality results.
If my subfloor is a bit uneven, do you recommend using leveling compound before installing the cement backer board, or can I get away with just the board if the difference is less than half an inch?
For slight unevenness of less than half an inch, most cement backer boards can handle minor irregularities, but it’s generally safer to use a leveling compound first. This ensures a flatter, more stable surface for your tile, reducing the risk of cracks or tiles loosening over time. If the subfloor dips or rises are noticeable, applying a leveling compound before installing the backer board is the better approach.
If I already have some basic tiling tools, how can I determine what else is truly essential to buy or rent for my specific project? Is there a difference in tool requirements for ceramic versus natural stone tiles?
To figure out what else you need, start by listing the tools you already have and compare them to the tool checklist in the article. For example, natural stone tiles usually require a wet saw, while ceramic tiles can often be cut with a manual tile cutter. Also, consider if you need specific trowels, spacers, or sealants based on your tile type. This way, you only buy or rent what your project really demands.
Based on your outlined steps, about how many days should I realistically set aside to complete a medium-sized room if it’s my first tile job and I have all the tools ready?
For a medium-sized room and as a first-timer, you should plan for about 3 to 4 days to complete the project. Day one is usually for prepping the subfloor and laying out your tile pattern. The second day would be for installing the tiles, and the third day is for letting the adhesive cure. On the fourth day, you can grout and clean up. Adding an extra day provides a buffer in case anything takes longer than expected.