

Introduction: Why Ceiling Fan Installation Is Worth Mastering
Ceiling fans are a classic home improvement upgrade that can dramatically improve comfort and energy efficiency in any room. They circulate air, help maintain even temperatures, and can even add a stylish focal point to your space. But for many homeowners, the prospect of installing a ceiling fan feels daunting. Worries about electrical wiring, heavy fixtures, and potential mistakes often lead people to put off the project or pay for professional installation. Yet, with the right tools, a clear step-by-step process, and some practical safety know-how, ceiling fan installation is well within reach for most DIYers. In this comprehensive guide, we’ll break down every aspect of the process—from selecting the right tools to common pitfalls that can lead to wobbly fans, electrical hazards, or wasted time. Whether you’re replacing an old light fixture or upgrading an outdated fan, this guide will equip you with the knowledge and confidence to get the job done safely, efficiently, and on budget.
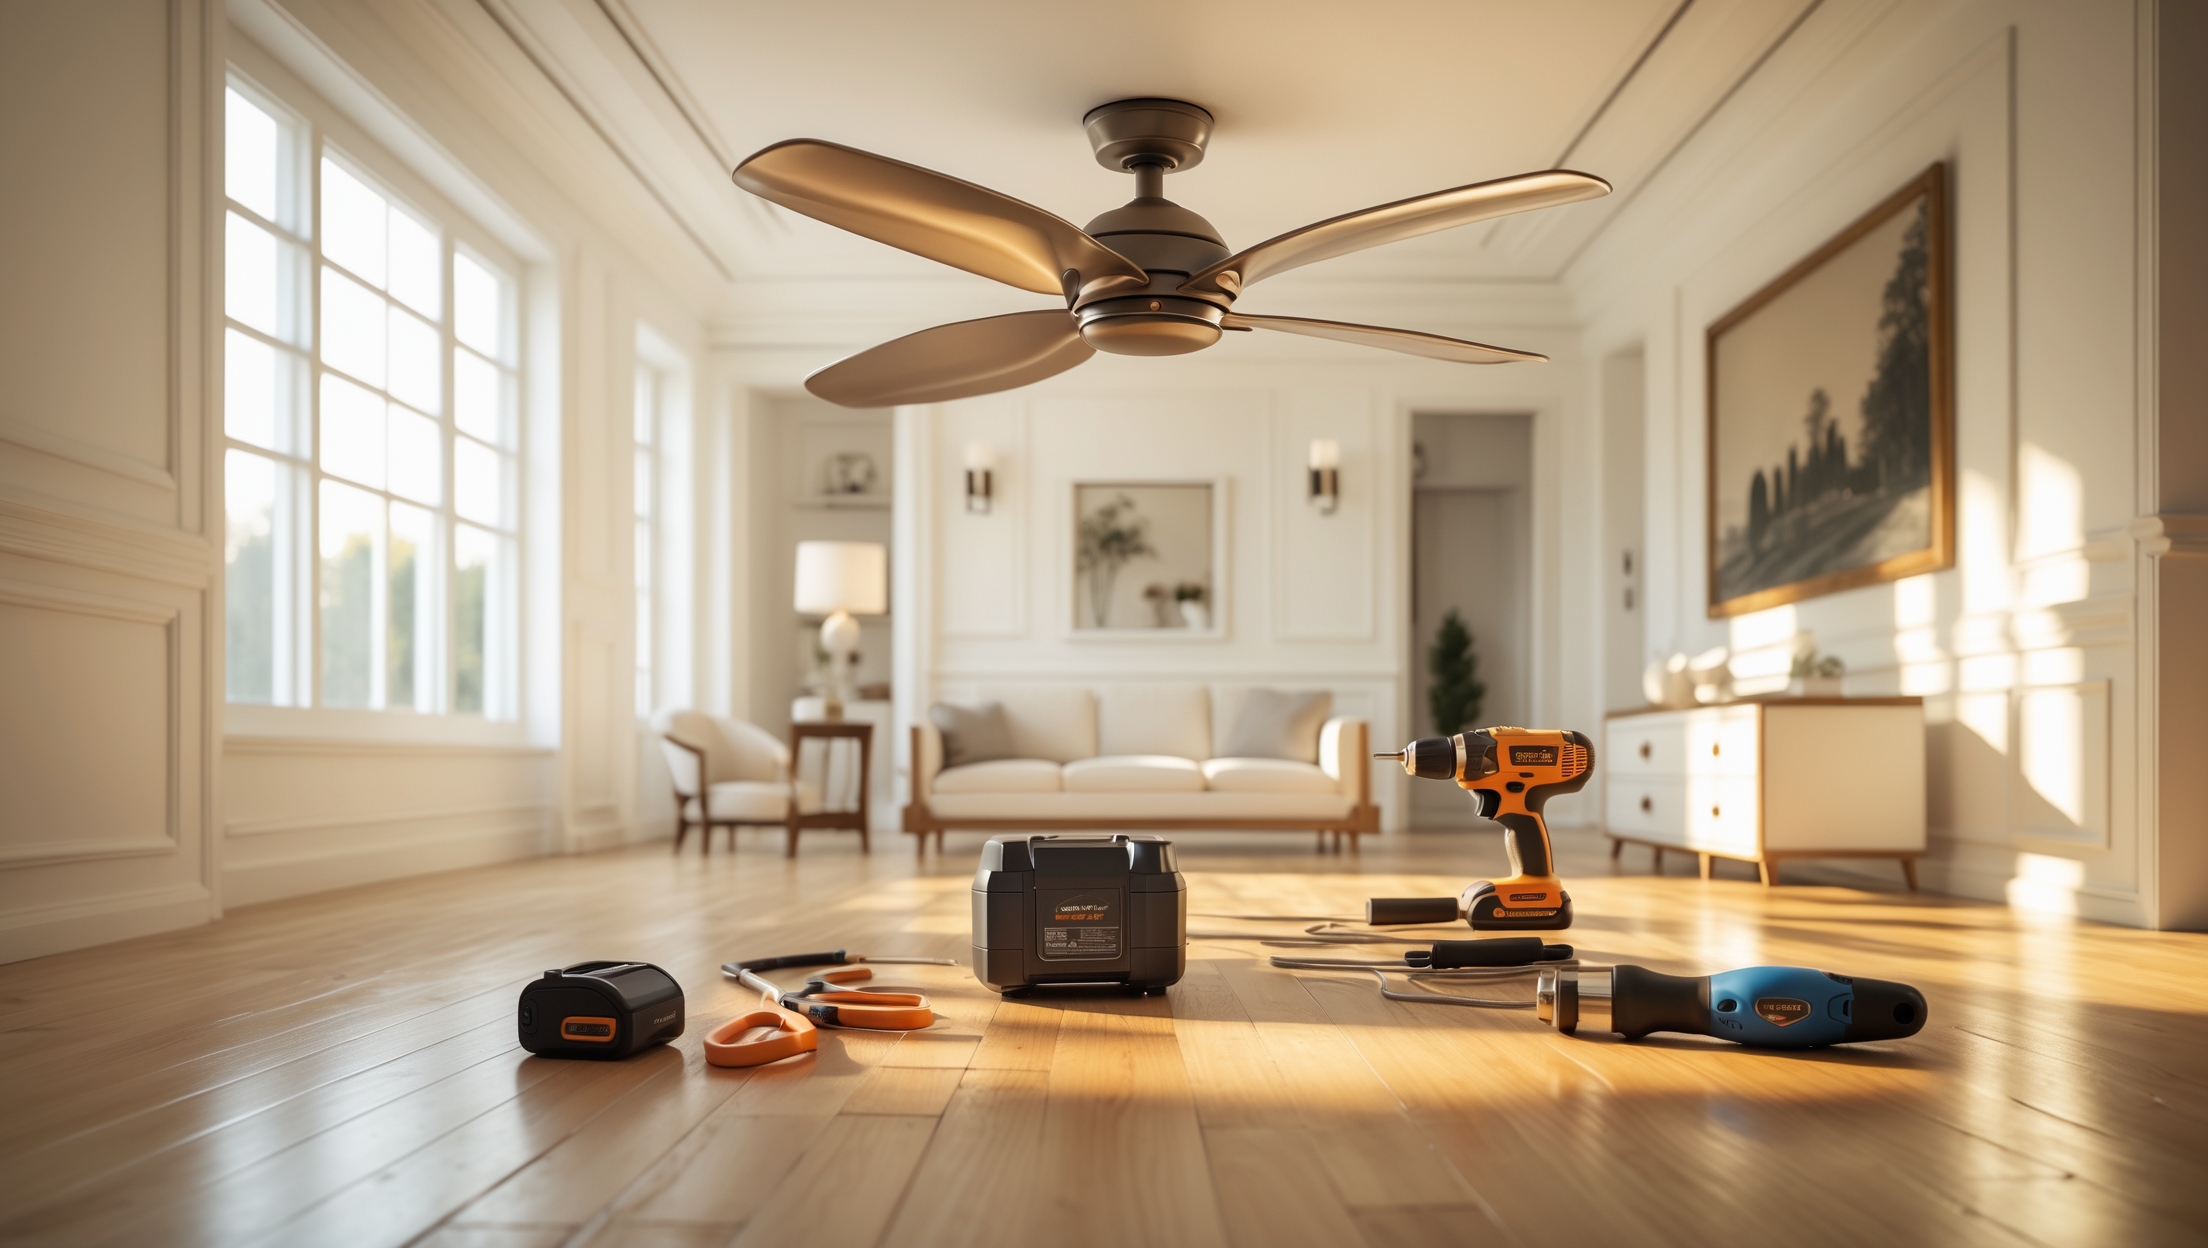
Essential Tools and Equipment for Ceiling Fan Installation
Must-Have Tools
- Voltage Tester: To confirm the power is off before working with wiring.
- Drill with Screwdriver Bits: For mounting the fan bracket and attaching the blades.
- Wire Strippers: For removing insulation from wire ends and making secure connections.
- Adjustable Wrench: Useful for tightening mounting bolts and downrods.
- Ladder: A sturdy, well-sized ladder to safely reach the ceiling.
- Stud Finder: To ensure you’re anchoring into a ceiling joist if needed.
- Phillips and Flathead Screwdrivers: For various mounting screws and connections.
- Electrical Tape: For securing wire nuts and connections.
- Level: To check that the fan and mounting bracket are perfectly horizontal.
Recommended Safety Gear
- Insulated gloves
- Safety glasses
- Non-slip work shoes
Ceiling Fan Kit: What’s Included?
Most ceiling fan kits include the fan motor, blades, mounting bracket, canopy, downrod (for high ceilings), light kit (optional), and all necessary hardware. Double-check the box before starting—you don’t want to be halfway through and realize a critical part is missing.
Budgeting for Ceiling Fan Installation
Cost of Materials
- Ceiling Fan: $60–$400 (basic to high-end models)
- Electrical Box (Ceiling Fan Rated): $8–$25
- Miscellaneous Hardware: $5–$15
- Optional Accessories (remote controls, wall switches): $25–$80
Tool Investment
If you don’t already own the essential tools, expect to spend $40–$150 on basics like a voltage tester, wire strippers, or a sturdy ladder. Many tools can be reused for future projects, making them a smart investment for any DIYer.
Professional Installation vs. DIY Savings
Hiring a licensed electrician to install a ceiling fan typically costs $100–$250 per unit. Doing it yourself can save a significant portion of that cost, especially if you plan to install multiple fans throughout your home.
Pre-Installation Checklist: Preparing for Success
- Read the Manufacturer’s Instructions: Each fan model has specific requirements—never skip this step.
- Inspect Existing Wiring: Verify that the wiring can handle the electrical load of a ceiling fan.
- Check the Ceiling Box: It must be rated for ceiling fans. Standard light fixture boxes are often not strong enough.
- Shut Off Power at the Breaker: Never rely on a wall switch alone.
- Clear the Workspace: Move furniture and cover floors to protect from falling hardware or dust.
- Assemble the Fan: Partially assemble the blades and light kit (if included) on the ground to simplify overhead work.
Step-by-Step Ceiling Fan Installation Process
Step 1: Remove the Old Fixture
With the power off at the breaker, remove the existing light fixture or old fan. Use a voltage tester to confirm there is no electricity at the wires. Unscrew the fixture, disconnect the wires, and carefully remove the mounting bracket.
Step 2: Upgrade the Ceiling Electrical Box
If the existing box is not rated for ceiling fan support, replace it with an approved metal or heavy-duty plastic box, securely attached to a ceiling joist or a fan-rated brace. This is critical—fans are much heavier and vibrate more than standard lights.
Step 3: Install the Mounting Bracket
Attach the mounting bracket from your fan kit to the electrical box using the provided screws. Ensure it’s tight and level. Use a level to double-check—an uneven bracket can cause wobbling later.
Step 4: Assemble the Fan Motor and Downrod
- If your ceiling is over 8 feet high, use the included or purchased downrod to lower the fan for optimal airflow.
- Assemble the fan motor and attach the downrod on the ground, following the manufacturer’s instructions.
Step 5: Make the Electrical Connections
With the fan motor suspended on the mounting bracket, connect the wires:
- Black (fan motor) to black (house supply)
- Blue (light kit, if present) to blue or black (house supply)
- White (neutral) to white
- Green or bare (ground) to bare copper or green
Use wire nuts and electrical tape to secure the connections. Tuck wires carefully into the box to avoid pinching when attaching the canopy.
Step 6: Attach the Canopy and Fan Blades
- Secure the canopy to cover the mounting bracket and wiring.
- Attach the fan blades to the motor, tightening each screw firmly. It’s easiest to do this with the blades pre-assembled on the ground if possible.
Step 7: Install Light Kit and Accessories
If your fan includes a light kit, connect the wires as directed, mount the kit, and install bulbs. Attach any additional accessories, such as pull chains or remote control receivers.
Step 8: Final Checks and Power Up
- Double-check all screws, especially the blade arms and downrod connections.
- Turn the power back on at the breaker and test fan operation at all speeds.
- Test the light kit and all switches/controls.
Common Mistakes to Avoid (and How to Fix Them)
Using the Wrong Electrical Box
Standard boxes aren’t designed for the weight and motion of a fan. Always use a ceiling fan–rated box. If you discover yours isn’t, replace it before proceeding to prevent dangerous failures.
Poorly Secured Mounting Bracket
Loose brackets are a prime cause of wobbly fans and noise. Always use the correct screws provided and a level to ensure proper alignment.
Incorrect Wiring
Mismatched wires can cause the fan or light kit to malfunction—or worse, create a fire risk. Refer to both the fan’s instructions and your home’s wiring color codes. When in doubt, consult an electrician.
Unbalanced Fan Blades
If your fan wobbles, check that all blades are firmly attached and at an equal distance from the ceiling. Use a blade balancing kit (often included) to fine-tune.
Overtightening Screws
This can strip threads or crack plastic parts. Tighten firmly but do not overtighten. If you strip a screw, replace it with the same size from a hardware store.
Skipping the Power Off Step
Never trust just the wall switch—always shut off the breaker and verify with a voltage tester. Electrical shocks are a serious hazard.
Wiring Tips for Safe and Reliable Operation
Understanding Your Home’s Wiring
Most U.S. homes have standard color codes, but older homes may vary. If you encounter non-standard or confusing wiring, stop and consult a professional. Never guess with electrical connections.
Double-Checking Connections
- Gently tug each wire nut to ensure a firm connection.
- Wrap wire nuts with electrical tape for added security.
- Neatly tuck wires to avoid pinching during canopy installation.
Upgrading Switches
If you want separate wall controls for the fan and light, you may need to run an additional wire (called a “switch leg”) from the wall switch to the ceiling box. This can require opening walls and is best done by an experienced DIYer or electrician.
Ceiling Fan Maintenance Best Practices
- Dust Blades Regularly: Use a microfiber cloth or ceiling fan duster to prevent dust buildup that can cause imbalance.
- Tighten Screws Annually: Check blade arms, mounting bracket, and downrod for looseness.
- Lubricate Bearings (if required): Most modern fans are maintenance-free, but older models may need occasional oiling.
- Check Electrical Connections: Every few years, inspect wiring if you notice flickering lights or unusual noises.
Ceiling Fan Safety Checklist
- Always turn off power at the breaker before working on the fan.
- Use a fan-rated electrical box and mounting hardware.
- Securely fasten all components—no rattles or wobbles.
- Install the fan at least 7 feet above the floor, and 18 inches from any wall.
- Do not install directly above bunk beds or high-traffic areas.
- Use proper wiring methods—never use makeshift connections or undersized wire nuts.
Troubleshooting: What to Do If Your Fan Doesn’t Work
Fan Won’t Start
- Check the breaker and wall switch.
- Verify that all wire nuts are secure.
- Ensure the remote control receiver (if used) is properly connected.
Fan Wobbles or Makes Noise
- Check for loose blade screws.
- Use a blade balancing kit.
- Recheck that the mounting bracket is secure and level.
Light Kit Doesn’t Work
- Confirm correct wiring.
- Check bulbs and fuses.
- Test with the pull chain and wall switch.
Conclusion: Ceiling Fan Installation—Empower Your DIY Skills
Installing a ceiling fan is one of the most practical and rewarding home improvement projects you can tackle on your own. With the right tools, careful preparation, and a methodical approach, you can transform any room for greater comfort and style—often in just a few hours. By following the step-by-step process outlined here, you’ll avoid the most common pitfalls that plague DIY installers, from wobbly fans to electrical headaches. Remember: safety is paramount. Always turn off the power, use fan-rated hardware, and consult a professional if you encounter unusual wiring or structural challenges. Take the time to balance your fan and perform regular maintenance; a properly installed ceiling fan can last for many years, lowering energy bills and enhancing your home’s appeal. Whether you’re refreshing a bedroom, upgrading a family room, or adding airflow to a home office, this newfound skill will serve you well for future projects. So, gather your tools, read those instructions, and bring the comfort of a ceiling fan to your favorite space—confidently and safely.
If I’m installing a ceiling fan where there was just a regular light fixture before, do I need to swap out the existing electrical box or can I use the one that’s already there? The article mentions mounting brackets but not the type of box required.
You’ll need to replace the existing electrical box if it’s only rated for light fixtures. Standard light fixture boxes aren’t designed to support the weight and movement of a ceiling fan. Look for an electrical box that’s specifically labeled for ceiling fan support and make sure it’s securely fastened to a ceiling joist or a fan brace. This will ensure safe installation and prevent future issues.
You mention that ceiling fan installation is well within reach for most DIYers if the right tools are available. For someone on a tight budget, which of the listed tools are absolutely essential for safety and what can possibly be improvised or borrowed?
For safety, the absolutely essential tools are a voltage tester (to ensure the power is off), a sturdy ladder, and a screwdriver. Wire strippers and pliers are also very helpful, but you can sometimes improvise with a utility knife and regular pliers if needed. Borrowing a drill and extra screwdrivers from friends or neighbors is a good option to keep costs down.
About the tools, can you clarify whether a regular household ladder is safe enough for this job, or should I invest in a specific type of ladder to reach higher ceilings securely?
A regular household ladder works fine for standard 8- to 9-foot ceilings, as long as it is sturdy and you can comfortably reach the mounting area without stretching. For higher ceilings, consider a taller fiberglass or aluminum ladder with non-slip feet for extra safety. Make sure your ladder is rated for your weight and always follow ladder safety guidelines when installing a ceiling fan.
You mention the importance of using a voltage tester and insulated gloves for safety, but are there any additional steps you recommend for businesses where the room wiring might be older or not up to current code?
For businesses with older wiring, it’s wise to turn off power at the main breaker and verify there’s no voltage on any wires before starting. Have a licensed electrician inspect the wiring to check for frayed insulation, outdated components, or improper grounding. If anything seems questionable or doesn’t match modern standards, it’s best to update or repair the wiring before installing a new ceiling fan.
If I want to swap out an old light fixture for a new ceiling fan, is there anything special I need to look for in the existing electrical box, or will most standard boxes work?
You’ll need to make sure the existing electrical box is rated specifically for ceiling fan support, not just a standard light fixture. Ceiling fans are heavier and create more movement, so the box must be securely fastened to a joist or beam and marked as “fan-rated” or “for ceiling fan support.” If it’s only rated for lights, you’ll need to replace it with a suitable fan-rated box before installing the fan.
When it comes to using a voltage tester, do you recommend a basic model or would a more advanced tester make the process safer or easier for a beginner like me?
For most ceiling fan installations, a basic non-contact voltage tester is sufficient and user-friendly for beginners. It will reliably let you know if wires are live without complicated features. Advanced testers offer more functions but aren’t necessary for simple tasks. Just make sure to read the instructions and always double-check before working on any wires.
When replacing an old light fixture with a ceiling fan, how can I tell if the existing electrical box is fan-rated? If not, how difficult is it for a DIYer to swap it out safely?
To check if your electrical box is fan-rated, look for a label inside the box stating it is rated for ceiling fans or supports 35 lbs or more. Metal boxes may be fan-rated, but plastic ones usually are not. If it’s not fan-rated, swapping it out is manageable for a DIYer with basic wiring skills: turn off the power, remove the old box, and install a fan-rated box securely to a ceiling joist or brace. Always follow safety precautions and consult a professional if you’re unsure.
When installing a ceiling fan where there was only a light fixture before, does the standard electrical box usually need to be replaced with a fan-rated box, or are there cases where you can use the existing one if it’s mounted securely?
When installing a ceiling fan in place of a light fixture, it’s important to use a fan-rated electrical box. Standard light fixture boxes usually aren’t designed to support the weight and movement of a ceiling fan, even if they seem secure. For safety and proper installation, always replace the existing box with a UL-listed fan-rated box, unless you’re certain the current box is specifically rated for ceiling fans.
If my ceiling fan starts to wobble a few days after installation, what are the first troubleshooting steps I should take based on the common mistakes you mentioned?
If your ceiling fan wobbles after installation, first turn off the power and check that all mounting screws and bracket connections are tight. Make sure the blades are securely attached and that none are bent or warped. Confirm that the blade arms are all at the same height and angle. If those parts are secure and the wobble persists, try using a blade balancing kit to correct any imbalances.
Out of curiosity, what’s the average total cost of buying all the recommended tools and safety gear if I don’t already own anything? I’m trying to decide if DIYing my ceiling fan install will actually save money.
If you’re starting from scratch, the total cost for all recommended tools and safety gear (like a voltage tester, wire strippers, drill, ladder, safety glasses, gloves, and screwdrivers) usually ranges from $100 to $200, depending on brands and quality. Add this to the price of the ceiling fan itself. If your installation is straightforward, DIY can still save money over hiring a professional, but it’s worth comparing both totals before deciding.
The guide talks about electrical hazards and wobbly fans as common mistakes. How can I be sure I’m mounting the fan evenly and connecting wires correctly to avoid those issues, especially if my ceiling isn’t perfectly level?
To ensure an even mount, use a ceiling fan-rated electrical box and a mounting bracket that allows for slight adjustments. Check the fan’s alignment with a level after installation. For wiring, always match wire colors (black to black, white to white, green or bare to ground), and use wire connectors. If the ceiling isn’t level, install a sloped-ceiling adapter or balance the fan blades with a balancing kit to prevent wobbling. Turn off power before starting work.
For someone on a tight budget, are there any tools on your must-have list that could be safely substituted or borrowed for a single ceiling fan install?
Absolutely, for a one-time ceiling fan installation, you can safely borrow tools like a voltage tester, wire stripper, and ladder if you don’t already own them. A basic screwdriver and pliers are essential and inexpensive, so you might want to buy those. Just make sure any borrowed tools are in good condition, and always double-check for safety before use.
When replacing an old light fixture with a ceiling fan, are there any special wiring differences or extra steps to watch out for, or can you usually just swap the fixtures using the existing wiring?
When swapping a light fixture for a ceiling fan, you often need more than just the existing wiring. Most ceiling fans require a stronger electrical box rated to support the fan’s weight and movement. Also, some fans need separate wires for the fan and light controls. Always turn off power first, check if your electrical box is fan-rated, and follow the fan’s wiring instructions carefully.
The excerpt says ceiling fan installation is doable for most DIYers with the right tools. Realistically, how long should a first-time installer expect this project to take if they’re replacing an old light fixture, and what tends to slow people down the most?
For a first-time installer replacing an old light fixture with a ceiling fan, the project usually takes about 2 to 4 hours. The most common slowdowns are dealing with unexpected wiring issues, securely mounting the fan bracket, and balancing the fan blades. Taking time to double-check wiring connections and following each step in the instructions helps avoid mistakes and makes the process go more smoothly.
How long should a typical ceiling fan installation take for someone doing it for the first time, assuming all the required tools and equipment from your list are on hand? Just trying to budget my weekend time realistically.
For a first-time installer with all the necessary tools and equipment ready, you can expect the ceiling fan installation to take about 2 to 3 hours. This time allows for reading instructions, securely mounting the fan, wiring, and balancing the blades. Setting aside a morning or afternoon should give you enough time to work carefully and avoid common mistakes.
How long would you estimate it usually takes for a first-time DIYer to install a ceiling fan when following these steps, and are there any parts of the process that tend to cause unexpected delays?
For a first-time DIYer, installing a ceiling fan typically takes between 2 to 4 hours. The process can take longer if you encounter issues like tricky wiring in older homes, removing an existing fixture, or assembling the fan components. Mounting the bracket securely and fitting all wiring connections properly are common steps where people experience delays, especially if the electrical box isn’t rated for ceiling fans.
You mentioned the importance of anchoring the fan into a ceiling joist with a stud finder. What are my options if my existing fixture isn’t located on a joist, and how critical is this for safety?
If your existing fixture isn’t attached to a ceiling joist, it’s very important for safety to use a fan-rated electrical box that’s designed for ceiling fans. These boxes can be secured between joists using a brace bar, providing the necessary support for the fan’s weight and movement. Anchoring properly prevents the fan from loosening or falling, which is crucial for safe operation.
You mention avoiding wobbly fans as a common pitfall. What troubleshooting steps do you recommend if the fan is perfectly level but still shakes or rattles once it’s running?
If your ceiling fan is level but still shakes or rattles, try tightening all mounting screws and blade brackets, as loose hardware is a common cause. Check for warped or damaged blades and ensure all blades are securely attached. You can also use a balancing kit, which usually comes with the fan, to fine-tune blade weight. Make sure the electrical box is rated for ceiling fans and firmly anchored, as movement here can cause vibration.
You mentioned the importance of getting the fan and bracket perfectly level. If my ceiling is a little uneven, will that create a wobble no matter what, or are there ways to compensate during installation?
A slightly uneven ceiling doesn’t automatically mean your fan will wobble. You can compensate by using leveling shims or washers between the bracket and the ceiling to create a level mounting surface. It’s important to check with a level before fully tightening the bracket. Also, make sure all screws are tight and blades are balanced for the smoothest operation.
If I’m swapping out an old light fixture for a new ceiling fan, do I need to upgrade the existing electrical box, or are most boxes already rated to support the weight and vibration of a fan?
Most existing electrical boxes for light fixtures are not rated to support the weight and movement of a ceiling fan. It’s important to check your current box: it should be marked as ‘fan-rated’ or ‘UL-listed for ceiling fans.’ If not, you’ll need to replace it with a proper fan-rated box to ensure safety and stability. This step is key to avoid accidents or damage.
If my ceiling is made of plaster instead of drywall, do any of the recommended tools or steps change for installing a ceiling fan, especially when it comes to finding a secure anchor point?
When installing a ceiling fan on a plaster ceiling, you’ll want to be extra careful to avoid cracking the plaster. Use a stud finder or gently probe to locate a ceiling joist—this is still your secure anchor point, just as with drywall. When drilling, start with a small pilot hole and use low speed to minimize damage. A ceiling fan-rated electrical box must be firmly attached to the joist for safety. Otherwise, the general steps and most tools remain the same.
If my ceiling isn’t perfectly level, will using the level tool be enough to prevent a wobbly fan, or are there other adjustments or products I should consider?
Using a level tool is helpful, but if your ceiling isn’t perfectly level, you may need to use a ceiling fan mounting bracket that compensates for uneven surfaces. Many fan mounting kits include self-leveling features or angled ceiling adapters. Double-check that the electrical box is secure and rated for ceiling fans, which also helps prevent wobbling. Balancing kits, often included with fans, can further fine-tune blade balance after installation.
You mention using a stud finder to make sure you’re anchoring into a ceiling joist if needed. Can you elaborate on what situations require anchoring to a joist versus using an existing electrical box, especially in older homes?
Anchoring to a ceiling joist is essential if the existing electrical box isn’t rated to support the weight and movement of a ceiling fan, which is often the case in older homes. Many older electrical boxes are only meant for light fixtures and may be attached just to drywall or plaster. In these cases, you should locate a ceiling joist and either attach a fan-rated box directly to it or use a brace that spans between joists for secure support. Always check the box’s rating and replace it if unsure.
You mention the importance of using a voltage tester before starting the wiring process. Is there a specific type or brand of voltage tester you recommend for someone who has never worked with electrical wiring before?
For beginners, a non-contact voltage tester is a great choice because it allows you to check for live wires safely without touching any exposed wiring. Brands like Klein Tools, Fluke, and Southwire are known for making reliable testers that are user-friendly. Look for a model with clear indicators (like lights or sound) and easy-to-understand instructions. Always read the manual before use to ensure proper operation and safety.
For someone on a tight budget, are there particular tools in your list that you think are absolutely necessary versus those that could be borrowed or improvised for a one-time installation?
For a one-time ceiling fan installation, the must-have tools are a voltage tester for safety, a screwdriver (usually Phillips and flathead), and wire strippers or a utility knife to prep wires. You could probably borrow or improvise with a ladder, pliers, and even a drill if the ceiling box is already installed. Just make sure whatever you use is sturdy and safe.
If after completing the installation I notice the fan is wobbling slightly, which of the common mistakes you mentioned is it most likely related to, and what troubleshooting steps would you suggest?
A wobbling ceiling fan is most often related to improper mounting or unbalanced blades, both of which are common installation mistakes mentioned in the article. First, double-check that the mounting bracket and electrical box are securely fastened. Next, ensure all blade screws are tightly secured and that each blade is properly aligned. If the wobble persists, try using a blade balancing kit, which can help pinpoint and correct any imbalance.
You mention common mistakes that could lead to a wobbly ceiling fan. What’s the best way to make sure my installation is level and secure, especially if my ceiling isn’t perfectly flat?
To ensure your ceiling fan is level and secure, even on an uneven ceiling, start by using a quality mounting bracket designed for sloped or irregular surfaces. Use a bubble level to check the bracket and electrical box before tightening everything down. If needed, add shims to correct minor gaps. Double-check that all screws and bolts are firmly tightened and that the fan blades are properly balanced once installed.
If you’re replacing an old light fixture with a ceiling fan, do you usually have to upgrade the existing electrical box or is it possible to use the same one if it feels secure?
When swapping a light fixture for a ceiling fan, it’s important to use an electrical box that’s rated specifically for ceiling fans, not just lights. Even if your current box feels secure, it might not be designed to support the extra weight and movement of a fan. Check the box itself—if it doesn’t say it’s fan-rated, it’s safest to replace it with one that is.
What is a typical timeframe for installing a ceiling fan for a first-time DIYer, accounting for all the steps you listed? Does it usually take a few hours, or should I set aside an entire day?
For a first-time DIYer, installing a ceiling fan typically takes about 2 to 4 hours if you follow all the steps carefully and have the right tools ready. If you’re unfamiliar with wiring or run into unexpected issues, it might take a bit longer. It’s wise to set aside half a day so you don’t feel rushed, but you probably won’t need the entire day.
If my ceiling is angled or vaulted, do I need any special tools or mounting equipment that aren’t listed in your must-have tools section? Hoping to avoid issues with alignment down the road.
For angled or vaulted ceilings, you’ll want to use an angled ceiling mount or a sloped ceiling adapter, which aren’t always included in basic ceiling fan kits. These special mounts help ensure the fan hangs straight and operates smoothly. Also, make sure to use a longer downrod if needed to provide proper clearance and alignment. Standard tools are usually fine, but double-check your fan’s instructions for any unique requirements.
I’ve heard some ceiling fans can wobble or make noise after DIY installation. What are the most common mistakes that cause this, and how do I avoid them from the start?
Wobbling or noise usually happens if the mounting bracket isn’t tightly secured, the blades aren’t balanced or screws are loose. Make sure you use the right hardware, tighten all screws, and double-check that the fan box is rated for ceiling fans. Also, ensure all blades are the same height from the ceiling and use the included balancing kit if needed. Taking time during installation helps prevent most issues.
If our ceiling is a little uneven or sloped, does using a level really fix future wobbles, or are there other adjustments I should keep in mind during installation?
Using a level helps ensure the mounting bracket is as horizontal as possible, which can reduce wobbling, but on an uneven or sloped ceiling, it might not be enough. For sloped ceilings, it’s best to use an angled ceiling adapter or a sloped ceiling mounting kit, which allows the fan to hang straight. Also, make sure all screws and bolts are tightly secured and the downrod is appropriate for the ceiling angle.
When upgrading from an old ceiling fan to a new one, are there any particular common mistakes with wiring that even experienced DIYers tend to overlook? I want to avoid having my fan run wobbly or not respond to the switches properly.
Yes, some frequent wiring mistakes can cause those issues, even for experienced DIYers. One is confusing the light and fan wires, which may cause the fan or light not to work with the intended switch. Another is not securing wire connections tightly, leading to poor contact or wobbling. Also, forgetting to connect the ground wire can affect stability and safety. Double-check wire colors and connections against the manufacturer’s diagram before final assembly.
The article talks about anchoring into a ceiling joist. What should I do if the existing electrical box isn’t attached to a joist, and is there an easy way to reinforce or replace it for the extra weight of a ceiling fan?
If your existing electrical box isn’t attached to a ceiling joist, it’s important to replace it with a fan-rated box designed to support the fan’s weight. You can use a retrofit fan brace, which fits through the existing hole and anchors securely between joists. Once installed, this brace provides the necessary support, and the new ceiling box attaches directly to it. Always make sure the box is specifically rated for ceiling fans to ensure safety.
How long should I expect the whole ceiling fan installation process to take if I’m doing it on my own for the first time and want to avoid the common mistakes you mentioned in the guide?
If you’re installing a ceiling fan for the first time and want to work carefully to avoid common mistakes, plan for the process to take about 2 to 3 hours. This gives you time to gather tools, read instructions, ensure safe wiring, and check your work at each step. Take it slow, and don’t rush—patience helps prevent errors.
I noticed the article mentions using a voltage tester to make sure the power is off before starting. Is there a particular type or brand you recommend for someone who’s not super experienced with electrical work?
For someone new to electrical work, a non-contact voltage tester is usually the safest and easiest option. Brands like Klein Tools, Fluke, and Southwire make reliable models that are user-friendly and widely available at hardware stores. Just make sure to read the instructions carefully and test it on a known live outlet before starting your ceiling fan installation.
How long should the whole ceiling fan installation process take for someone with basic DIY experience, from removing the old fixture to turning the fan on?
For someone with basic DIY skills, the whole process usually takes about 1.5 to 3 hours. This includes removing the old fixture, assembling the fan, wiring everything safely, mounting the fan, and testing it. If the wiring or mounting bracket needs extra work, it might take a bit longer. Just make sure to turn off the power before you start.
What are some budget-friendly ceiling fan models or kits that include all the necessary parts and tools, so I don’t end up spending extra on things not included in the box?
For a budget-friendly option, look for brands like Harbor Breeze, Hampton Bay, or Westinghouse—they offer kits that usually include all mounting hardware, blades, and a basic remote or pull chains. Most also come with the essential installation screws and brackets, but you’ll typically need your own screwdriver and wire stripper. Double-check the box details or product description to confirm which tools are included, as some kits may provide a small wrench or balancing kit.
How long does the installation process typically take for a beginner who is being careful and following all the steps? I want to set aside enough time to avoid rushing, but I’m not sure what’s realistic.
For a beginner taking a careful, step-by-step approach, you should plan for about 2 to 4 hours for the entire ceiling fan installation. This includes unpacking, reading instructions, gathering tools, wiring, mounting, and testing the fan. If you’re unfamiliar with electrical work, give yourself a little extra time to review safety steps. Setting aside a full afternoon is realistic and will help you avoid feeling rushed.
I noticed you list both a voltage tester and insulated gloves as essential safety gear. Is it overkill to use both, or have you found instances where one alone wouldn’t catch a wiring hazard during fan installs?
Using both a voltage tester and insulated gloves is not overkill—each serves a different safety purpose. A voltage tester helps you identify live wires before you start working, but in rare cases, wiring faults or accidental power returns can happen unexpectedly. Insulated gloves provide ongoing protection against accidental shocks while handling wires, even if you’ve already tested for voltage. For maximum safety, it’s best to use both tools together.
When using a stud finder to anchor the ceiling fan, what should I do if my studs don’t line up with the electrical box location? Is it still safe to proceed, or do I need additional hardware?
If your ceiling studs don’t line up with the electrical box, you shouldn’t mount the fan directly to drywall or just the box itself. Instead, use a fan-rated brace or mounting box designed to span between the joists—these are made to provide the necessary support even when the box isn’t directly attached to a stud. This ensures your fan is safely and securely anchored.
If my current ceiling light fixture doesn’t have a ceiling joist above it, how do I make sure the new ceiling fan is securely anchored? Do I need to move the box or can I use special mounting hardware?
If there’s no ceiling joist above your fixture, you shouldn’t just use the existing box. Instead, you need a fan-rated electrical box designed for secure mounting between joists. These boxes come with expandable braces that anchor to the joists on either side of the opening, providing strong support for the fan. Moving the box isn’t necessary if you use this type of hardware.
Once the fan is installed, how do I check if I’ve avoided common mistakes like a wobbly fan or unsafe wiring? Are there any signs I should look for before finishing and cleaning up?
After installing your ceiling fan, check for wobbling by running it at different speeds—any shaking or rattling could mean the blades are unbalanced or mounting is loose. Ensure all screws and brackets are tight. For wiring, confirm all connections are secure and properly capped, and check if the fan and lights operate smoothly without flickering or unusual noises. If you smell burning or see sparks, turn off the power immediately and re-inspect your wiring.
The article mentions how important it is to ensure the fan and mounting bracket are perfectly horizontal using a level. Do you have any tips for correcting a slight tilt if I notice the fan isn’t completely straight after installation?
If you notice your ceiling fan isn’t perfectly level after installation, try loosening the mounting bracket screws slightly and adjust the bracket until it sits flat, using your level for reference. Tighten the screws evenly while checking the alignment. Also, double-check that the electrical box and ceiling surface are secure and even, as an uneven base can cause a tilt. If needed, use thin shims between the bracket and ceiling to achieve a perfectly horizontal position.
If the fan keeps wobbling even after I use a level and tighten all the screws, what’s the most common cause? Is it usually about the blades themselves, the mounting bracket, or something with the ceiling?
If your ceiling fan keeps wobbling after leveling and tightening, the most common culprit is usually the blades. Uneven or warped blades, or blades that aren’t installed at the same angle, can cause persistent wobble. Sometimes, dust buildup or slight differences in blade weight can also be factors. It’s also worth double-checking that the mounting bracket is secure and properly aligned with the ceiling box, but blades are the most frequent issue.
I noticed you mention using a voltage tester before touching any wires. Could you explain exactly where to test and what I should look for to be sure everything is safe before I start taking down my old fixture?
To ensure safety, use the voltage tester on all wires in the ceiling box—especially the black (hot), white (neutral), and any exposed copper or green (ground) wires—after turning off the breaker. Touch the tester to each wire separately and to any metal parts in the box. If your tester lights up or beeps, there’s still voltage present. Only proceed when every wire tests as dead.
I noticed the article lists a voltage tester as an essential tool. Are there specific types you recommend for someone who’s never done electrical work before, or will any basic tester from the hardware store do the trick?
For beginners, a simple non-contact voltage tester is a great choice. They’re easy to use—just hold it near wires to check for live electricity—so there’s no need to touch any bare wires. Most basic models from reputable brands at hardware stores work well for home projects like ceiling fan installation. Just make sure the tester is rated for household voltage (usually up to 600V) and always read the instructions before use.
I’m curious about the price range for all the essential tools listed here. Is it possible to complete an installation on a tight budget without sacrificing safety?
You can expect to spend around $40 to $100 for the basic tools needed, such as a screwdriver set, voltage tester, wire stripper, pliers, and a sturdy ladder. Many of these tools are available in budget versions at hardware stores. Just make sure not to compromise on safety—prioritize a reliable voltage tester and a stable ladder, even if it means spending a little more.
If my ceiling doesn’t have an existing fan or light fixture, are there additional tools or steps I should be prepared for beyond what you listed? I’m trying to get a full picture of what’s involved before deciding to DIY or hire out.
Yes, installing a ceiling fan where there’s no existing fixture involves extra steps. You’ll need to run new wiring from a power source to the ceiling location, install a ceiling fan-rated electrical box secured to a joist, and possibly add a wall switch. This might require tools like a stud finder, drill with long bits, fish tape for wiring, and possibly a drywall saw. If you’re not comfortable working with electrical wiring or making new connections, hiring a professional is safer.
How long should a beginner realistically expect a full ceiling fan replacement to take from start to finish? I want to know if it’s something I could tackle in an afternoon or if I need to block out a whole weekend.
For most beginners, replacing a ceiling fan typically takes about 2 to 4 hours, assuming standard wiring and no complications. This includes removing the old fan, assembling the new one, following instructions, and being cautious with wiring. You can definitely tackle it in an afternoon, but if your ceiling is high or the wiring is tricky, you might need a bit longer.