

Introduction: The Silent Threat of Hidden Plumbing Leaks
Home improvement projects often focus on the visible: fresh paint, new fixtures, or upgraded appliances. However, some of the most critical issues lurk out of sight, quietly undermining your home’s integrity and your peace of mind. Hidden plumbing leaks are a prime example. These covert culprits can wreak havoc, leading to structural damage, mold growth, inflated utility bills, and costly repairs. If left unchecked, a tiny drip behind a wall or under a floor can escalate into thousands of dollars in damages. For homeowners—especially those inclined to DIY—understanding how to detect, address, and prevent hidden plumbing leaks is essential. In this comprehensive guide, we’ll walk you through the subtle signs of a leak, practical detection methods, detailed cost breakdowns for repairs, and proven strategies for prevention. With the right knowledge and tools, you can protect your investment and keep your home dry, safe, and efficient.
Understanding Hidden Plumbing Leaks
What Are Hidden Leaks?
Unlike obvious leaks that result in visible puddles or dripping faucets, hidden plumbing leaks occur within walls, under floors, or in seldom-visited crawlspaces. These leaks might originate from aging pipes, failed joints, corroded fittings, or even small cracks in supply lines.
Why Are They So Dangerous?
- Structural Damage: Persistent moisture weakens wood framing, drywall, and flooring, leading to rot and costly repairs.
- Mold and Mildew: Damp environments are breeding grounds for mold, which can spread quickly and pose health risks.
- Wasted Water: Even a slow leak can waste thousands of gallons per year, inflating your water bill.
- Electrical Hazards: Leaks near wiring increase the risk of shorts and electrical fires.
Early Warning Signs of Hidden Leaks
Spotting a hidden leak early can make a dramatic difference in repair costs and home safety. Watch for these telltale signs:
- Unexpected Spike in Water Bills: An unexplained increase may indicate water loss somewhere in the system.
- Musty Odors: Persistent damp or musty smells, especially in basements or closed-off rooms, could signal moisture behind walls.
- Discolored or Warped Walls/Floors: Stains, bubbling paint, peeling wallpaper, or buckling floors suggest trapped water.
- Sounds of Running Water: If you hear water running when all fixtures are off, investigate further.
- Mold Spots: Small patches of mold or mildew, especially in unusual places, are often a red flag.
DIY Leak Detection: Step-by-Step
Visual Inspection
Start with a thorough walk-through:
- Check under sinks, around toilets, behind appliances, and in basements or crawlspaces for moisture or staining.
- Look at ceilings below bathrooms and kitchens for discoloration.
- Inspect exposed pipes for corrosion or condensation.
Monitor Your Water Meter
- Turn off all water-using appliances and fixtures.
- Note the position of the water meter dial.
- Wait two hours without using water; if the dial moves, you likely have a hidden leak.
Toilet Dye Test
- Add a few drops of food coloring to your toilet tank.
- Wait 30 minutes without flushing.
- If color appears in the bowl, the flapper or valve is leaking.
Infrared and Moisture Meters
Affordable moisture meters can detect hidden dampness in walls or floors. Infrared thermometers or cameras, available for rent at many hardware stores, reveal temperature differences that may indicate water accumulation.
When to Call a Professional
Some leaks demand professional attention:
- Persistent, unexplained mold growth.
- Water stains that grow over time.
- Suspected slab leaks (leaks in pipes beneath your foundation).
- Major drops in water pressure without an obvious cause.
Licensed plumbers use advanced tools, such as acoustic sensors and thermal imaging, to pinpoint leaks with minimal wall or floor damage. Early intervention by a professional can save money and prevent extensive home repairs.
Cost Breakdown: Finding and Fixing Hidden Leaks
Detection Costs
- DIY Tools: Moisture meters ($20–$50), infrared thermometers ($30–$100), water leak detector alarms ($10–$40 each).
- Professional Leak Detection: $150–$500, depending on complexity and equipment used.
Repair Costs
- Minor Leaks (e.g., loose fittings, small cracks): $125–$350 (parts and labor).
- Hidden Leaks in Walls/Floors: $500–$2,500 (includes demolition, repair, and restoration).
- Slab Leak Repairs: $2,000–$6,000 (may require rerouting pipes or breaking up concrete).
- Water Damage Restoration: $1,000–$4,000 (for mold remediation, drywall, and flooring repairs).
Insurance Coverage
Homeowner’s insurance may cover sudden or accidental leaks, but not gradual damage from neglected maintenance. Always document damage and repairs, and contact your insurer promptly if you discover a hidden leak.
Preventing Future Leaks
Routine Maintenance
- Inspect visible plumbing under sinks, in basements, and crawlspaces every few months.
- Check appliance hoses (washing machines, dishwashers, refrigerators) annually for signs of wear or cracks.
- Flush your water heater yearly to remove sediment that can corrode the tank.
- Insulate pipes in unheated areas to prevent winter freezing and bursting.
Upgrade Vulnerable Plumbing
- Replace old galvanized steel pipes, which are prone to corrosion, with modern materials like PEX or copper.
- Install water leak detectors with shut-off valves for high-risk areas (laundry rooms, basements, near water heaters).
Monitor Water Pressure
High water pressure stresses pipes and joints, increasing leak risk. Use a pressure gauge to check your home’s pressure (ideal is 40–60 psi). Install a pressure-reducing valve if needed.
Be Mindful of What Goes Down Drains
- Avoid pouring grease, oil, or coffee grounds in sinks; these can clog pipes and cause backs-ups and leaks.
- Use hair catchers in showers and bathtubs to prevent slow drains and overflow.
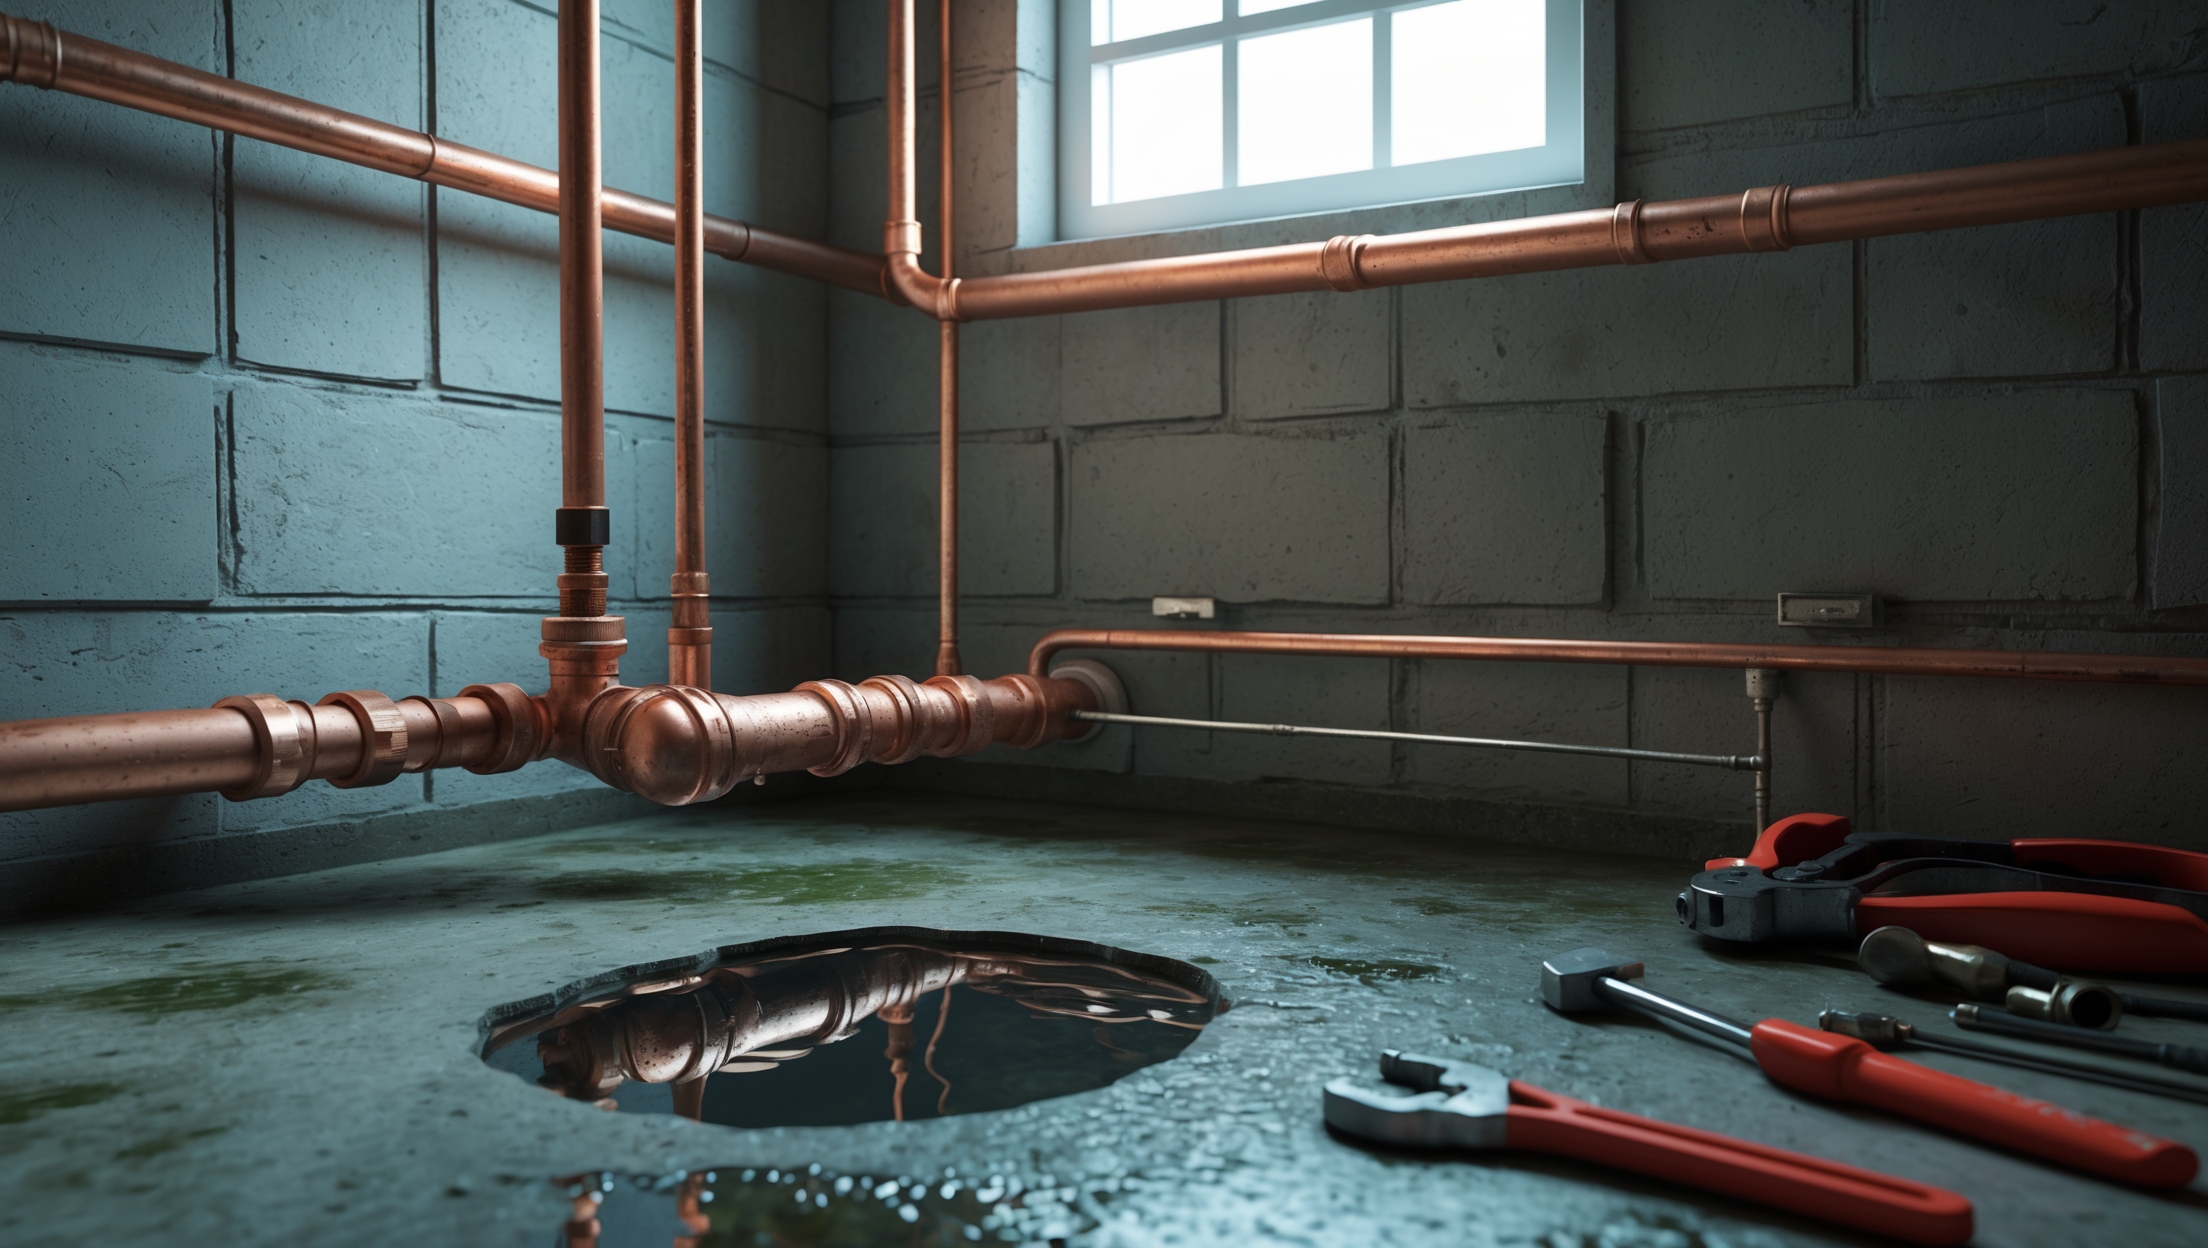
Best Tools and Equipment for Leak Detection and Repair
- Moisture Meter: Detects dampness behind walls and under floors.
- Infrared Thermometer: Finds cold spots where water may be accumulating.
- Pipe Wrench and Adjustable Wrench: For tightening or replacing fittings.
- Pex Pipe Cutter: For clean, safe cuts on modern piping.
- Plumber’s Tape (Teflon tape): Ensures watertight seals on threaded connections.
- Flashlight and Inspection Mirror: For checking hard-to-see areas.
- Leak Detection Dye or Tablets: Useful for locating toilet or drain leaks.
- Smart Water Sensors: Send alerts to your phone if moisture is detected.
Common Myths About Hidden Plumbing Leaks
- Myth: Leaks always create visible puddles.
Fact: Many leaks stay hidden behind walls or under floors for months before surfacing. - Myth: New homes don’t develop hidden leaks.
Fact: Poor installation or defective materials can cause leaks in even the newest homes. - Myth: Minor leaks aren’t urgent.
Fact: Even small leaks can lead to big problems if ignored.
Case Study: Stopping a Costly Leak Before Disaster Struck
The Problem: A homeowner in a 20-year-old house noticed a faint musty smell in the guest bedroom. With no visible water, they initially ignored it. Two months later, a small patch of discoloration appeared on the baseboard.
The Process: Using a moisture meter, the homeowner detected high moisture in the wall. They called a professional, who used thermal imaging to pinpoint a leaking pipe joint in the bathroom above.
The Outcome: The plumber cut a small section of drywall, repaired the joint, and caught the problem before mold took hold. The total cost: $450. If left undetected, repairs could have exceeded $3,000 for mold remediation and structural restoration.
Step-by-Step: How to Fix a Small Accessible Leak
- Shut off the water supply to the affected area.
- Open faucets to drain remaining water from the pipes.
- Use a towel to dry the area and pinpoint the leak’s source.
- For threaded joints, unscrew and wrap threads with plumber’s tape before re-tightening.
- For cracked pipes, use a pipe repair clamp or epoxy putty as a temporary fix until professional repair.
- Turn the water back on and check for leaks.
- Monitor the area over the next several days for signs of continued moisture.
Maintenance Checklist: Keep Plumbing Leaks at Bay
- Inspect under sinks and around toilets every 2–3 months.
- Examine ceilings below bathrooms and kitchens quarterly for stains or sagging.
- Test your water meter for leaks every six months.
- Replace old appliance hoses every 5 years (more often if signs of wear appear).
- Flush the water heater annually.
- Insulate exposed pipes before winter.
- Install and test smart water sensors yearly.
Conclusion: Protecting Your Home from the Unseen
Hidden plumbing leaks represent one of the most insidious threats to any home. Unlike dramatic burst pipes or overflowing appliances, these leaks often go undetected until significant damage has occurred. As we’ve explored, early detection is a homeowner’s best defense. By staying vigilant for subtle signs—such as unexplained water bills, musty odors, or small stains—you can catch leaks before they escalate. Embracing affordable DIY detection methods, investing in smart leak sensors, and conducting routine inspections all help prevent costly surprises. When in doubt, trust the expertise of a professional plumber for complex or persistent problems.
The cost of proactive leak detection and repair is a fraction of what you may face if water damage or mold remediation becomes necessary. Insurance can help in some cases, but prevention is always preferable to restoration. Make routine plumbing checks an integral part of your home maintenance plan, and don’t hesitate to upgrade aging pipes or install monitoring technology. By taking these practical steps, you’ll safeguard your property, your wallet, and your family’s well-being—ensuring your home remains a safe, dry, and comfortable haven for years to come.
Are there any specific detection methods for hidden leaks that a regular homeowner can try before calling in a professional? The article mentions subtle signs, but I’m wondering about any DIY tools or techniques that could help pinpoint a problem early.
Homeowners can try a few DIY methods to detect hidden leaks before calling a professional. One approach is to check your water meter—note the reading, avoid using water for a couple of hours, then recheck it. If the reading changes, you might have a leak. You can also use food coloring in toilet tanks to spot leaks into the bowl. Affordable moisture meters are available at hardware stores and can help detect dampness behind walls or under floors.
When budgeting for repairs if a hidden leak is discovered, are there specific factors that cause the costs to escalate quickly? For example, does the location of the leak (like inside a wall vs. under a floor) make a big difference?
Yes, the location of a hidden leak can greatly influence repair costs. Leaks inside walls or under floors often require more extensive work to access and repair, which means higher labor charges and possibly additional costs for replacing drywall, flooring, or tiles. Other factors that can drive up costs include the extent of water damage, the type of plumbing materials, and whether mold remediation is needed.
Can you expand on the early signs section a bit more? If I see a sudden jump in my water bill but don’t notice any damp spots or mold, what are some specific places in my house I should check first for leaks?
If your water bill suddenly goes up and you don’t see obvious damp spots or mold, check under sinks, around toilets, and behind appliances like dishwashers and washing machines. Also inspect your basement, crawl spaces, and areas near water heaters for any signs of moisture or corrosion. Sometimes leaks occur in places like toilet tanks or inside walls, so listening for dripping or running water can also help pinpoint hidden issues.
Your guide covers detecting and fixing leaks, but what are the best ongoing prevention tips? For instance, how often should pipes or joints be checked or replaced in an average home to minimize the risk of hidden leaks?
To minimize hidden leaks, inspect visible pipes and joints under sinks and in basements at least twice a year for moisture, corrosion, or drips. Have a licensed plumber do a full home inspection every 2–3 years. Most modern pipes last decades, but if your home is over 40 years old, consider proactively replacing original plumbing or problematic materials like galvanized steel. Regularly check water pressure and monitor water bills for sudden changes, which can signal leaks.
Can you provide a rough estimate of repair costs for common hidden leak scenarios, like behind drywall versus under flooring? I’m trying to budget ahead just in case something turns up during my own home inspection.
For hidden leaks behind drywall, repair costs typically range from $500 to $1,500, depending on the extent of water damage and the size of the affected area. Leaks under flooring can be more expensive, often between $1,000 and $4,000, since repairs might involve removing and replacing flooring materials and possibly subflooring. These estimates include both plumbing repairs and restoration work.
The article notes structural damage and potential electrical hazards resulting from hidden leaks. In cases where both water and electrical systems are affected, what are the safest immediate steps a homeowner should take before calling in a professional?
If you suspect both water and electrical systems are involved, your first priority is safety. Immediately turn off the main water supply to stop further leaking, then switch off the electricity at the main breaker, especially if you notice water near outlets or wiring. Avoid contact with wet electrical fixtures or appliances. Once these steps are done, leave the area if needed and contact a licensed plumber and electrician for professional assessment and repairs.
For prevention, are there specific types of pipes or fittings you’d recommend replacing first in an older home to minimize future hidden leak problems and reduce repair costs in the long run?
In older homes, it’s wise to prioritize replacing galvanized steel pipes and old polybutylene or lead piping, as these are more prone to corrosion and leaks. Also, check and update fittings and connectors, especially at joints, as these are common leak points. Copper or PEX piping are generally reliable and can help minimize future leaks and repair costs.
The article talks about detecting leaks behind walls or under floors. Are there any reliable DIY detection tools you recommend that are effective but budget-friendly for a homeowner?
Yes, there are some effective and budget-friendly DIY tools for detecting hidden leaks. An inexpensive moisture meter can help you identify damp spots in walls or floors. Acoustic leak detectors are another option, allowing you to listen for water movement behind surfaces. Also, infrared thermometers or thermal cameras, which are becoming more affordable, can spot temperature changes caused by water. These tools, combined with careful inspection, can help you catch leaks early without professional equipment.
After discovering a small leak under the floor, how quickly do I need to act to prevent structural damage and mold? Is there a specific timeframe where repairs should happen to minimize long-term costs?
You should address a leak under the floor as soon as possible—ideally within 24 to 48 hours. Water can quickly seep into structural materials, leading to mold growth and weakening of wood or subflooring. The faster you repair the leak and dry out the area, the lower your risk of serious damage and expensive repairs later on.
With rising water bills being an early warning sign, do you have any advice on how much of an increase should be considered suspicious enough to start looking for hidden leaks?
A sudden increase of 10% or more in your water bill compared to previous months, without changes in your household usage, can be a sign of a hidden leak. If your bill is steadily climbing or you notice any unexplained spikes, it’s wise to check for leaks around your home and consider consulting a plumber if you can’t find the cause.
If a homeowner notices a sudden increase in their water bill but finds no visible signs of leaks, what’s the first step you would recommend for pinpointing the source before calling in a professional?
If your water bill suddenly jumps but you can’t see any leaks, start by checking your water meter. Turn off all faucets and water-using appliances, then observe the meter—if it’s still moving, there’s likely a hidden leak. You can also check toilets by adding food coloring to the tank; if the color seeps into the bowl without flushing, the toilet is leaking. These steps help narrow things down before you call a plumber.
For preventative maintenance, are there specific types of leak detectors or tools you recommend for homeowners who aren’t very experienced with plumbing? How effective are these at catching problems before they get serious?
For homeowners with little plumbing experience, smart water leak detectors are a great choice. These battery-operated devices can be placed near appliances, under sinks, or by water heaters. They alert you via sound or smartphone app if moisture is detected. Models like Flo by Moen or Honeywell Lyric are popular and quite effective at catching small leaks early, helping prevent bigger issues by giving you time to act before damage occurs.
I’m concerned about how much repairs might run if I catch a leak early versus if it’s been going for a few months. Do you have a ballpark range for repair costs at different stages of damage?
If you catch a leak early, repairs might only cost between $150 and $500, usually covering minor pipe fixes and patching. If the leak goes undetected for a few months, costs can rise dramatically—often $1,000 to $4,000 or more—because of water damage to walls, floors, or mold remediation. The sooner you address a leak, the less expensive the repairs typically are.
For older homes with aging pipes, are there any preventive strategies you’ve found particularly effective in catching small cracks or failed joints before they turn into hidden leaks?
For older homes, regular visual inspections of exposed pipes, especially in basements and crawl spaces, help spot signs of corrosion or moisture early. Installing smart water leak sensors near vulnerable areas is also highly effective. Scheduling periodic professional inspections with a plumber can detect small cracks or weak joints using tools like thermal imaging or moisture meters before leaks become severe.
If a hidden leak caused some minor mold in a wall, should I be more concerned with health risks or with the structural integrity of the building? The article mentions both, but I’m not sure which one to tackle first.
If you notice minor mold from a hidden leak, it’s important to address both health risks and structural integrity, but health risks often take priority. Mold can affect indoor air quality and trigger allergies or respiratory issues. After stopping the leak, remove and clean affected materials as soon as possible. Once the area is dry and mold-free, check for any structural damage to ensure there’s no lasting impact on your home.
How often should homeowners actually do inspections for hidden plumbing leaks to prevent major problems? Is it something I should check monthly, yearly, or only when I notice signs like higher bills or musty smells?
It’s a good idea to do a basic check for hidden plumbing leaks about every 3 to 6 months, even if you don’t notice any signs. Look for damp spots, mold, or changes in water pressure. However, a more thorough inspection by a plumber can be done yearly. Regular checks help catch small leaks early, preventing bigger issues down the line.
Can you give a ballpark estimate of what typical hidden plumbing leak repairs cost for a homeowner who only wants to tackle minor fixes themselves? I’m concerned about budget since professional help seems pricey.
For minor hidden plumbing leaks that a homeowner can fix themselves, such as tightening fittings, replacing washers, or patching small pipe sections, you can expect to spend around $20 to $75 on materials and basic tools. If you already have some tools, costs could be on the lower end. More extensive repairs or materials like pipe replacements can add to the cost, but these usually require a professional.
If a leak is discovered under a floor, what are the most common preventive strategies to keep it from happening again, especially in older homes with aging pipes?
For leaks under a floor, especially in older homes, the best preventive strategies are replacing old or corroded pipes with modern materials like PEX or copper, ensuring proper insulation to protect against temperature swings, and having regular professional inspections. It’s also important to address any foundation shifts or settling that could stress the pipes. Fixing minor leaks early and maintaining good water pressure can help prevent future issues.
The article talks about subtle signs like unexpected spikes in water bills. For a business, our water usage can fluctuate a lot. Are there other early warning signs I should especially watch for that aren’t as dependent on water bill changes?
Absolutely, for businesses where water usage varies, consider watching for damp or musty odors, unexplained wet spots on floors or walls, mold growth, and low water pressure in certain areas. Sounds of running water when everything is off or cracks in walls and flooring can also be hints. Regularly inspecting plumbing fixtures and areas with hidden pipes can help catch leaks early before they cause major issues.
Regarding the cost breakdown, do homeowners insurance policies typically cover repairs for hidden leaks, or would these out-of-pocket costs usually fall entirely on the homeowner?
Homeowners insurance might cover the damage caused by a hidden plumbing leak, such as water-damaged floors or walls, if the leak was sudden and accidental. However, insurance usually does not pay for the actual repair of the plumbing itself or for leaks caused by neglect or gradual wear. Out-of-pocket costs often include fixing the pipe, while insurance may help with related repairs if your policy allows it.
If a hidden leak is found under the floor, how long does it usually take for structural damage like wood rot or drywall problems to start showing up? I’m trying to figure out how urgent repairs are once a leak is discovered.
Once a hidden leak is discovered under the floor, structural damage can begin developing in as little as one to two weeks, especially if the area stays damp. Wood rot may start within this timeframe, and drywall can show water stains, swelling, or mold soon after. The longer the leak is left unrepaired, the more severe and costly the damage becomes, so prompt repairs are strongly recommended.
You mentioned that hidden leaks can be caused by aging pipes or failed joints. Is there an average lifespan for typical household plumbing before leaks become more likely, especially in older homes?
Most household plumbing pipes have an average lifespan that varies by material. Copper pipes typically last 50 years or more, while galvanized steel generally lasts 20 to 50 years. PVC pipes can last up to 50 years as well. However, older homes with original plumbing may be closer to the end of these ranges, making leaks more likely. Regular inspections help spot issues before they turn into major problems.
In your article, you mention that even slow leaks can waste thousands of gallons per year and spike utility bills. Could you share more specific tips on monitoring water usage or meters to catch these subtle leaks before they cause higher costs?
To catch subtle leaks early, regularly check your water meter when no water is being used—note the reading, wait about two hours without using water, then check again. Any change suggests a leak. Also, some modern meters have leak indicators, like small spinning dials or icons, that move even with minimal flow. Monitoring your monthly water bill for unexpected increases can also help spot hidden leaks before they become costly.
With busy schedules, how often do you recommend homeowners check for the early warning signs of a hidden plumbing leak? Is there a seasonal schedule that makes sense?
It’s a good idea to check for early warning signs of hidden plumbing leaks at least once every three months, especially if you have a busy schedule. Adding a quick inspection at the start of each new season works well—look for damp spots, unusual water bills, or musty odors. Seasonal checks also help catch issues after temperature changes, which can affect pipes.
I’m curious about prevention strategies—are there particular types of plumbing materials or fixture upgrades you recommend that can help minimize the risk of hidden leaks in older homes?
Upgrading to PEX or copper piping can dramatically reduce leak risks compared to older galvanized steel or polybutylene pipes. Installing high-quality, modern shut-off valves and fixtures with stainless steel braided supply lines is also smart. Consider adding leak detection sensors near appliances, and have a plumber inspect your system for weak joints or outdated materials. These steps can help ensure your home’s plumbing is less prone to hidden leaks.
Could you elaborate on the typical repair costs for hidden leaks found within walls versus those under the floor? I’m trying to understand what might be more expensive to fix if I catch a leak late.
Repairing hidden leaks within walls generally costs between $500 and $1,500, depending on the extent of damage and accessibility. Leaks under the floor can be pricier, ranging from $1,000 to $4,000, since accessing pipes often requires removing and replacing flooring. If a leak goes undetected for a while, costs can climb due to water damage, mold remediation, and increased labor. Underfloor leaks tend to be more expensive to address than wall leaks, especially in finished spaces.
The article says hidden leaks can start from aging pipes or failed joints. For a first-time homeowner, how often should I be checking my pipes, and are there any regular maintenance steps to prevent these kinds of leaks?
For a first-time homeowner, it’s a good idea to visually inspect exposed pipes—like those under sinks or in basements—at least twice a year. Look for moisture, corrosion, or small drips. Regular maintenance includes keeping pipes insulated, monitoring water pressure, and promptly fixing minor leaks before they worsen. Also, consider having a plumber do a thorough inspection every couple of years, especially in older homes.
Could you clarify what the average repair costs might be if structural damage or mold growth has already started from a hidden plumbing leak?
If structural damage or mold has already begun due to a hidden plumbing leak, repair costs can increase significantly. Structural repairs might range from $2,000 to over $10,000, depending on damage severity and location. Mold remediation typically adds another $1,000 to $6,000. These are averages; exact costs depend on the extent of the issue and local rates. It’s generally much cheaper to address leaks early before major problems develop.
For homeowners who like to do repairs themselves, are there any simple detection methods to reliably spot leaks under flooring without taking up boards or making holes?
Yes, there are a few non-invasive ways to check for hidden leaks under flooring. Look for signs like unexplained dampness, musty odors, or warped floors. You can also monitor your water meter: turn off all water fixtures, then check if the meter moves, which suggests a hidden leak. Moisture meters, available at hardware stores, let you scan floors for unusual moisture levels without causing any damage.
How quickly can structural damage or mold develop after a hidden leak starts? Is there a general timeframe where prompt action can minimize the most serious consequences?
Structural damage and mold can begin developing within just 24 to 48 hours after a hidden leak starts, especially in warm or humid conditions. Acting quickly in this initial window is crucial to minimize the risk of serious problems. If you suspect a leak, it’s best to address it immediately by shutting off the water supply and contacting a professional for inspection and repair.
You mention repairs for structural damage can be expensive. Can you provide a ballpark estimate for costs if a leak goes undetected for several months versus catching it right away? I’m trying to budget for possible issues in our home.
If a leak is caught quickly, you might only need to pay for pipe repairs and minor water damage, which could range from $150 to $1,000 depending on the severity and location. If a leak goes undetected for months, structural repairs like replacing drywall, flooring, or even parts of the foundation can push costs much higher, often between $5,000 and $25,000 or more. Early detection makes a huge difference in keeping costs down.
I’m curious about the cost breakdown for repairing hidden plumbing leaks. Could you provide some typical price ranges for repairs if the leak is behind a wall versus under the floor?
Repairing hidden plumbing leaks can vary in cost depending on the location and complexity. If the leak is behind a wall, repairs typically range from $500 to $1,500, as this usually involves opening and then restoring the wall. Leaks under the floor can be more expensive, often between $1,000 and $3,500, due to the extra labor to access and repair the pipes as well as flooring restoration. These are average estimates; costs can be higher if significant damage or mold is present.
If a hidden leak is discovered during a DIY home improvement project, what should my immediate next steps be before calling in a professional? Is there anything I can do right away to prevent further damage?
If you find a hidden leak, first shut off the main water supply to prevent more water from escaping and causing damage. Next, try to dry any affected areas as quickly as possible using towels or fans, and move belongings away from the leak. Take photos of the leak and any water damage for insurance purposes. These steps help minimize damage before a professional plumber assesses and repairs the problem.
If I notice a sudden increase in my water bill but don’t see any obvious leaks or water stains, what are some specific places I should check first for hidden plumbing leaks as a DIY homeowner?
If your water bill has spiked but you don’t see visible leaks, start by checking under sinks, around toilets (especially at the base), and behind appliances like dishwashers or washing machines. Inspect cabinets for moisture or musty smells. Also, look at your water heater and any exposed pipes in the basement or crawl spaces. Lastly, listen for running water when everything is off—sometimes leaks are hidden inside walls or floors.
You mention that mold can be a big problem from hidden plumbing leaks. What are some practical steps a small business owner can take to identify mold early in those hard-to-see places before it spreads?
To spot mold early in hidden areas, regularly inspect places prone to moisture, like under sinks, behind appliances, and around pipes. Use your nose to detect musty smells, which can signal mold growth. Consider installing a humidity monitor—mold thrives above 60% humidity. Small moisture meters or inexpensive infrared thermometers can also help detect damp spots inside walls or floors before mold becomes visible.
How should I prioritize repairs if I suspect both mold growth and potential structural damage from a hidden leak? Which issue becomes urgent sooner, and do plumbers usually handle both problems or would I need to contact different specialists?
If you suspect both mold growth and structural damage from a hidden leak, address the water source first—stop the leak to prevent further harm. Structural damage is typically more urgent because it can compromise your home’s safety, but mold also poses health risks and spreads quickly. Plumbers generally fix leaks, but you’ll likely need a contractor or structural engineer for building repairs and a mold remediation specialist for mold cleanup.
For DIY-inclined homeowners, could you clarify which detection tools or techniques are most reliable for finding hidden leaks before they cause major structural damage? I’d rather try a few steps myself before calling in a professional.
For DIY detection, start by monitoring your water meter—turn off all water fixtures and see if the meter continues to move. Listen for unexplained dripping or hissing sounds in walls or floors. Moisture meters and infrared thermal cameras are reliable tools to spot cold or damp areas behind surfaces. Food coloring in toilet tanks can help catch silent leaks. These steps can catch leaks early, but if you notice persistent moisture or high bills, it’s best to consult a professional.
If someone is comfortable with basic DIY tasks, are there safe and reliable detection tools or techniques they can use before calling a professional plumber to investigate suspected hidden leaks?
Yes, there are several safe methods and tools for DIY leak detection. You can monitor your water meter for unexpected changes, look for damp spots or mold, and listen for the sound of water running when all fixtures are off. Affordable moisture meters, leak detection dyes (for toilets), and even infrared thermometers can help pinpoint hidden leaks. If you notice persistent signs of moisture or rising water bills and can’t find the source, it’s wise to consult a professional.
As a parent trying to juggle DIY home repairs, do you have advice on the safest way to check behind walls or under floors for leaks without causing extra damage?
Absolutely, there are safe ways to check for hidden leaks without tearing things apart. Start by looking for signs like damp spots, bubbling paint, or musty odors. You can use a moisture meter to scan walls and floors—these are affordable and non-invasive. If you suspect a leak but can’t locate it, consider using a thermal imaging camera, which many hardware stores rent out. This way, you avoid unnecessary damage while pinpointing problem areas.
Are there any particular types of home insurance policies that help cover the costs of repairs from hidden plumbing leaks, or is this usually out-of-pocket for homeowners?
Most standard home insurance policies typically cover sudden and accidental water damage from hidden plumbing leaks, but they may not cover damage resulting from neglected maintenance or slow leaks over time. It’s important to review your specific policy details or check with your insurance provider, as coverage can vary. Some insurers also offer optional water damage endorsements for additional protection.
Can you provide some advice on what practical detection methods work best for someone who isn’t very experienced with DIY projects? I’m worried about missing something serious behind my walls or under floors.
For beginners, start by looking for visible signs like water stains, bubbling paint, or musty smells, especially near baseboards and ceilings. Listen for unusual dripping or hissing sounds. You can also check your water meter: if it’s moving when no water is being used, that’s a sign of a hidden leak. For peace of mind, consider using simple moisture detectors that alert you to leaks in concealed areas.
I noticed you addressed leaks under floors and inside crawlspaces. How often should business owners with older plumbing inspect these hard-to-reach areas, and are there preventative maintenance routines that can help avoid hidden leaks altogether?
For businesses with older plumbing, it’s wise to inspect under floors and inside crawlspaces at least once or twice a year. Between inspections, keep an eye out for signs like unexplained moisture, higher water bills, or musty odors. Preventative maintenance should include regular checks for corrosion, ensuring insulation is intact, and having a professional plumber do a thorough annual assessment. Promptly addressing small drips or dampness helps avoid major hidden leaks down the line.
If I notice an unexpected spike in my water bill but don’t see any visible water, are there simple DIY steps I can take to confirm if I have a hidden leak before calling a plumber?
Yes, you can do a few simple checks. First, turn off all faucets and water-using appliances, then check your water meter. If the meter is still moving, you likely have a leak. Another method is to add food coloring to your toilet tank; if color appears in the bowl without flushing, your toilet may be leaking. These steps can help confirm a hidden leak before you call a plumber.
How long does it usually take for a hidden plumbing leak to cause serious structural damage? I want to know how urgently I need to address potential issues.
The timeline for serious structural damage from a hidden plumbing leak can vary a lot based on factors like the size of the leak, building materials, and location. In some cases, damage can start within weeks, especially if the leak is near wood framing or drywall. It’s best to address any potential leaks as soon as you notice signs to prevent costly repairs and major issues down the line.
Once a leak is found behind a wall, how quickly do I need to act before mold becomes a serious problem? Is there a window of time where drying things out is enough, or do I always need to replace affected materials?
Mold can start growing within 24 to 48 hours of moisture exposure, so it’s important to act quickly. If the leak is caught early and materials dry out thoroughly within that window, you may not need to replace everything. However, if drywall or insulation stays damp longer or shows mold, it’s safer to replace those sections to prevent health issues and further damage.
You talked about structural damage from persistent moisture. If I catch a small leak early enough, will there still be long-term problems, or can repairs fully restore things like drywall and framing?
If you catch a small leak early, you can usually prevent long-term problems. Prompt repairs to drywall and framing, combined with thorough drying of the area, typically restore everything without lasting effects. However, make sure all moisture is eliminated to avoid hidden mold or gradual deterioration. Acting quickly is key to a full recovery.
For older homes with original plumbing, do you recommend proactively replacing pipes to avoid hidden leaks, or is regular inspection usually enough? How can a homeowner determine when replacement is more cost-effective than repairs?
For older homes with original plumbing, the decision depends on the pipe material, age, and history of leaks. If your pipes are galvanized steel or polybutylene and over 50 years old, replacement is often safer and more cost-effective long-term. For copper or PVC in good condition, regular inspections may suffice. Frequent leaks, visible corrosion, water discoloration, or low pressure indicate it’s time to consider full replacement instead of ongoing repairs.
If a leak is discovered behind walls or under flooring, what’s typically involved in the repair process and how disruptive can it get? I’m concerned about the potential hassle and cost if something is found during a remodel.
When a leak is found behind walls or under flooring, repair often involves opening up those areas to access the damaged pipes. This means sections of drywall or flooring may need to be removed, which can be disruptive and sometimes costly. After fixing the leak, you’ll also need repairs to restore the wall or floor. The extent of disruption and cost depends on the leak’s location, the materials involved, and how much needs to be replaced.
If my water bill suddenly spikes but I can’t find any visible leaks, what’s the first practical step you’d recommend for a homeowner before bringing in a plumber? Are there any simple DIY methods to narrow down the source?
If your water bill jumps but you don’t see obvious leaks, try checking your water meter first. Turn off all taps and appliances, then look at the meter—if it’s still moving, you likely have a hidden leak. You can also listen for hissing sounds near toilets or under sinks, and place a few drops of food coloring in toilet tanks to see if color seeps into the bowl. These steps can help narrow down the issue before calling a plumber.
I’m on a strict household budget. Based on your breakdown of repair costs, how much should I realistically set aside in case I discover a hidden plumbing leak? Are there affordable ways to prevent them in the first place?
For a hidden plumbing leak, it’s wise to budget between $150 and $1,000, as repair costs can vary depending on the damage and location. Setting aside about $500 should cover most minor to moderate leaks. To prevent leaks affordably, check for drips regularly, insulate exposed pipes, and avoid using harsh drain cleaners. Simple maintenance can help you avoid bigger repair bills.
When it comes to detecting leaks in harder-to-reach areas like crawlspaces, is it better for a homeowner to try DIY methods or should I go straight to professional help? What are the pros and cons of each approach?
For crawlspaces, DIY methods like moisture sensors or visual checks can help spot obvious leaks, but limited access and visibility often make them less effective. Professionals use specialized tools and have the experience to detect hidden issues quickly and safely. DIY can be cheaper but may miss concealed problems, while professional help costs more but reduces the risk of ongoing water damage. For hard-to-reach areas, professional assessment is usually the safer bet.
For those of us who like to tackle home repairs ourselves, what tools or methods do you suggest for locating leaks behind walls or under floors without having to cause unnecessary damage to drywall or flooring?
To locate hidden leaks without damaging drywall or floors, you can use a moisture meter to detect damp spots, an infrared thermal imaging camera to spot temperature changes from leaking water, or an acoustic leak detector that listens for water movement. Also, look for visible signs like stains or mold. These non-invasive tools and methods help pinpoint leaks before opening up any walls or floors.
You talk about hidden leaks causing structural damage and mold growth if left unchecked. Once a leak is detected, how quickly should it be addressed to prevent these problems from developing, and are there signs that indicate urgent intervention is needed?
Once a hidden leak is detected, it’s best to address it as soon as possible—ideally within a day or two. Delays can allow water to spread, increasing the risk of structural damage and mold. Signs like persistent dampness, musty odors, visible mold, sagging walls or ceilings, or a sudden spike in your water bill all indicate that urgent intervention is needed.
You outlined that a small leak behind a wall could lead to mold growth and even electrical hazards. If a homeowner suspects a leak but isn’t sure where it is, what are the safest first steps to take before calling in a professional, especially if wiring might be compromised?
If you suspect a hidden leak and think it could be near electrical wiring, avoid touching outlets or switches in the affected area. Turn off the power supply to that part of the house at the breaker box as a precaution. Limit water use until a professional can assess the situation, and document any visible signs like damp spots or discoloration to help guide the plumber.
If mold starts to appear as a result of a hidden leak, what are the first actions a homeowner should take to prevent health risks and further structural damage while arranging for professional repairs?
If you notice mold from a hidden leak, it’s important to limit access to the affected area to reduce health risks, especially for children and those with allergies. Try to ventilate the space if possible and avoid disturbing the mold, as this can spread spores. Turn off the water supply to stop further leakage, and document the damage for insurance. Contact professionals quickly for both plumbing repairs and mold removal, as prompt action helps prevent further damage and health issues.
You mentioned that hidden leaks can sometimes start from corroded fittings or small cracks in supply lines. Is there a particular type of piping material that is more prone to these hidden leaks, or are all common household pipes equally at risk?
Some piping materials are definitely more prone to hidden leaks. For example, older galvanized steel pipes can corrode from the inside over time, leading to hidden leaks. Copper pipes can develop pinhole leaks if water chemistry is aggressive. Polybutylene pipes, which were used in homes from the late 1970s to mid-1990s, are especially notorious for failing unexpectedly. Modern PEX and CPVC pipes tend to be more resistant, but no material is completely immune. Regular inspection can help catch issues early, regardless of the pipe type in your home.
When it comes to prevention, are there particular types of pipe materials or fittings that are less likely to develop these hidden leaks over time, especially in older homes?
Copper and PEX pipes are generally less prone to hidden leaks compared to older galvanized steel or polybutylene pipes, which can corrode or become brittle over time. Brass fittings also tend to be more durable. If your home has older piping, it may be worth considering an upgrade to these more reliable materials to help prevent future leaks.
If I find a hidden leak behind a wall, which is more cost-effective in the long run: hiring a plumber right away or attempting a DIY repair? The article talks about structural damage, so I’m curious about the risks involved.
If you find a hidden leak behind a wall, hiring a plumber is usually more cost-effective long-term. DIY repairs can sometimes miss the full extent of the problem, leading to greater structural damage and higher repair costs later. Professional plumbers can accurately locate and fix leaks, reducing the risk of ongoing hidden water damage.
In the section about early warning signs, you highlight checking for unexpected spikes in water bills. Are there specific water usage thresholds or patterns that homeowners should monitor regularly to catch leaks before they cause major damage?
Keep an eye out for sudden increases in your monthly water bill that aren’t explained by changes in household activity. A good rule of thumb is if your usage jumps by more than 10-15% from your average, it could signal a hidden leak. Also, look for continuous water meter movement when all water is off, as this may indicate a problem.
As a homeowner who likes to tackle projects myself, can you recommend specific detection methods or tools that are best suited for finding leaks under floors or inside walls?
For finding leaks under floors or inside walls, consider using a moisture meter to detect damp areas without opening up surfaces. An infrared thermal camera can also help by showing temperature differences caused by hidden water. For pinpointing pipe leaks, an acoustic leak detector listens for the sound of running water behind walls. These tools are well suited for DIY homeowners and can help you identify trouble spots before calling in a professional.
For those of us who enjoy DIY projects, what are some reliable ways to prevent hidden plumbing leaks in older homes with aging pipes? Are there periodic maintenance tips or product upgrades we should prioritize?
For older homes with aging pipes, regular inspections are key. Check for damp spots, discoloration, or mold around plumbing fixtures and walls. Tighten loose fittings and replace worn washers or seals. Installing water leak detectors near high-risk areas offers early warnings. If you can, upgrade old supply lines to braided stainless steel hoses and consider adding pressure regulators to avoid stress on pipes. Flushing your water heater annually also helps prevent leaks from sediment buildup.
The section about hidden leaks causing mold and health risks caught my attention. If I’ve had a slow leak for a while, what are the first steps I should take to check for mold and address any potential air quality issues in my home or workplace?
If you’ve had a slow leak, start by inspecting areas near the leak for visible mold, musty odors, or water stains—especially behind walls, under sinks, or in crawl spaces. Use a moisture meter if available. If you suspect mold but can’t see it, consider hiring a professional to assess both mold and air quality, as they have specialized tools and can recommend safe clean-up or remediation.
Are there any quick troubleshooting steps you recommend if you notice subtle signs like slight mold or a musty smell, but aren’t sure if it’s definitely a plumbing issue?
If you notice slight mold or a musty smell, start by checking under sinks, around toilets, and near appliances for damp spots or discoloration. Look for water stains on walls and ceilings, and listen for any faint dripping sounds. Try running water in suspect areas and watch for any changes. If you can’t pinpoint the source, a moisture meter can help identify hidden dampness before calling a professional.
If I notice a sudden spike in my water bill but don’t see any visible water damage, what’s the best next step? Should I try a water meter test myself or is it safer to get a professional inspection right away?
If your water bill jumps unexpectedly but you don’t see obvious leaks, trying a water meter test yourself is a good first step. Turn off all water fixtures, then check if the meter is still moving—if it is, you likely have a hidden leak. If you confirm unusual meter activity or can’t pinpoint the cause, it’s wise to call a professional to investigate further and avoid potential damage.
Could you clarify how quickly mold can develop after a hidden leak begins? I want to know the general time frame I have to act before mold becomes a serious problem, especially since I have employees with allergies.
Mold can start developing within 24 to 48 hours after a hidden leak begins, especially in warm and humid conditions. It’s important to address leaks as soon as possible to reduce the risk of mold growth, which can worsen quickly and cause allergy issues for sensitive individuals. Acting fast can help protect your employees and avoid larger remediation costs.
How do the repair costs break down for hidden leaks behind walls compared to those under floors or in crawlspaces? I’m trying to budget for possible fixes and curious if certain locations are much pricier to address.
Repair costs for hidden leaks can vary based on location. Leaks behind walls often require cutting and repairing drywall, which adds to both labor and material expenses. Under-floor leaks may involve pulling up flooring or tiles, which can get costly, especially with hardwood or tile. Crawlspace leaks typically have lower access and repair costs, though they may need extra moisture control afterward. Generally, repairs behind finished walls and under floors tend to be pricier than those in crawlspaces due to restoration work.
Could you break down the typical repair costs for hidden leaks based on location, like if the leak is behind a wall versus under a floor? I’m trying to budget for potential issues in my older home.
Repair costs for hidden leaks can vary a lot by location. If a leak is behind a wall, you might pay $500 to $1,500, depending on how much drywall needs repair. Leaks under floors can be more expensive—usually $1,000 to $3,000—because flooring may need to be removed and replaced. Costs go up if plumbing is hard to reach or if there’s water damage to surrounding materials.
The article mentions that leaks can start from aging pipes or corroded fittings. Are there any specific types of pipes or materials in older US homes that are more prone to hidden leaks?
Yes, certain pipe materials in older US homes are more leak-prone. Galvanized steel pipes, commonly used before the 1960s, often corrode and develop hidden leaks over time. Cast iron drain pipes, found in homes built before the 1970s, can also crack or rust through. Copper pipes, while durable, may be vulnerable if the water is highly acidic or the installation is poor. If your home is older, it’s a good idea to check what type of piping you have and consider replacing problem materials.
With all the risks like mold and structural damage that you outlined, is there a rough timeframe for how quickly things can escalate after a hidden leak starts? Are there urgent warning signs to watch for besides just a higher water bill?
How quickly a hidden leak leads to serious problems can vary, but mold can begin to grow in as little as 24-48 hours if the area is damp. Structural damage might take weeks or months, depending on leak size and materials affected. Besides a higher water bill, look for musty odors, unexplained damp spots, peeling paint, warped flooring, or the sound of running water when taps are off. Acting fast if you notice these signs can help prevent bigger issues.
I see you mentioned utility bills as an early warning sign. Are there specific changes in water usage or bill patterns that should make a homeowner especially suspicious of a hidden leak?
Yes, sudden spikes in your water bill without an obvious reason—like guests or filling a pool—can point to a hidden leak. Also, consistent increases over several billing cycles, even if small, may be a red flag. If your water usage is rising while your daily routines haven’t changed, it’s a good idea to investigate further for possible leaks.
How do the repair costs for hidden plumbing leaks compare between older homes with aging pipes versus newer builds? Does the material of the pipes make a big difference in either the likelihood of leaks or the cost to fix them?
Repair costs for hidden plumbing leaks tend to be higher in older homes, mainly because aging pipes are more prone to corrosion, breakage, and may require extensive replacement. The material of the pipes does matter—galvanized steel and older copper pipes are more likely to develop leaks and can be costlier to repair or replace than modern materials like PEX or PVC. Newer builds with up-to-date materials usually see lower repair costs and less frequent leaks overall.
Are there particular types of pipes or plumbing materials mentioned in your guide that are more prone to hidden leaks or failures in older homes?
Yes, the guide highlights that older homes often have galvanized steel and polybutylene pipes, both of which are more susceptible to hidden leaks and failures over time. Galvanized pipes can corrode internally, causing blockages and leaks, while polybutylene pipes are known to become brittle and crack. These materials are commonly found in homes built before the 1990s and are worth checking if you’re concerned about hidden leaks.
I saw you noted leaking pipes behind walls can sometimes originate from aging pipes or corroded fittings. Are there any specific home ages or pipe materials that tend to be more at risk for hidden leaks?
Yes, older homes, especially those built before the 1970s, are more prone to hidden leaks due to aging pipes. Galvanized steel and cast iron pipes, common in older houses, often corrode and develop leaks over time. Copper pipes can also develop pinhole leaks with age. Newer homes with modern PEX or CPVC piping generally have fewer issues, but regular inspections are still recommended.
Is there a recommended way to find hidden leaks before they actually show up as water damage or high bills? For example, are there specific tools or techniques homeowners can use that don’t require tearing into walls before calling a professional?
Yes, there are a few ways to catch hidden leaks early. Homeowners can use moisture meters to check for dampness in walls or floors, and thermal imaging cameras can help spot unusual cold or wet spots. Also, regularly monitoring your water meter—by turning off all water and seeing if the meter still moves—can be a simple way to detect leaks before any visible damage occurs.
You mentioned water bill spikes as an early warning sign. Are there any specific patterns or amounts on the bill that should raise a red flag, or is any increase worth investigating for a possible hidden leak?
It’s normal for water bills to fluctuate slightly, but a sudden and unexplained increase—especially if your usage habits haven’t changed—should definitely catch your attention. For example, if your bill jumps by 10-20% or more from one month to the next, it’s a good idea to investigate. Consistent small increases over a few months without a clear reason can also signal a hidden leak.
You mentioned that leaks can originate from aging pipes or failed joints. Is there a way to tell which kind of issue I’m dealing with before opening up the wall or floor, or does that always require a pro or specialized equipment?
Sometimes you can get clues about the type of leak before opening anything up. For example, leaks from failed joints often show as water stains or damp spots near pipe connections or fittings, while aging pipes may cause more widespread or recurring leaks in straight pipe sections. However, pinpointing the exact issue without opening the wall usually requires a plumber’s expertise or specialized tools like moisture meters or inspection cameras.