

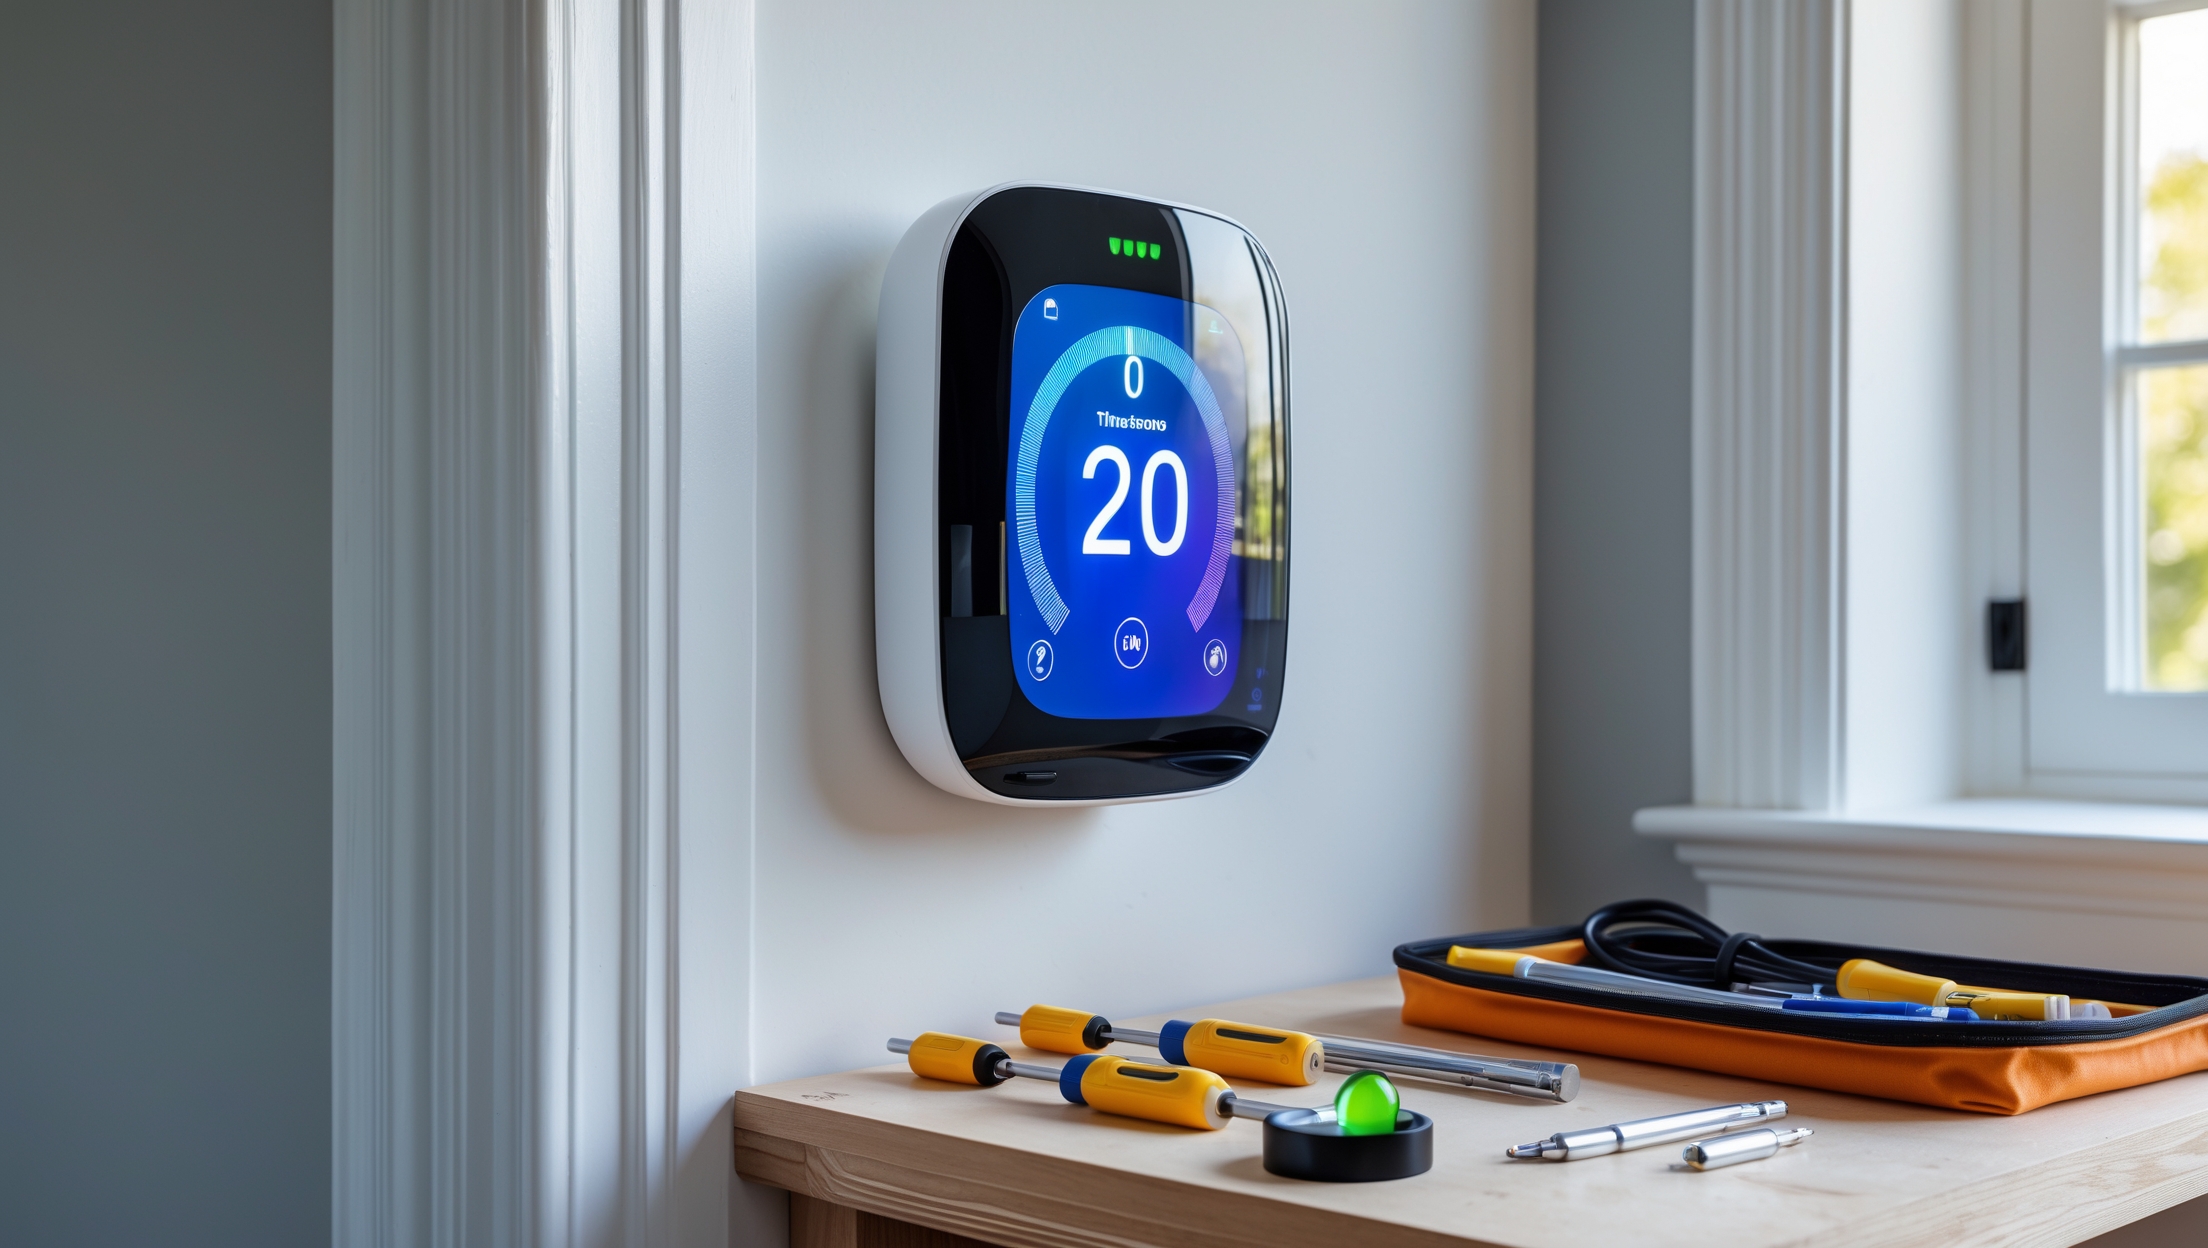
Introduction: Why Upgrade to a Smart Thermostat?
Home technology has advanced rapidly, and nowhere is this more apparent than in the way we control our indoor environment. Smart thermostats have become one of the most popular upgrades for homeowners seeking comfort, convenience, and energy savings. These devices go far beyond basic temperature control, offering features like learning your schedule, remote access via smartphone, integration with voice assistants, and energy usage reports. Whether you’re aiming to reduce your utility bills or simply enjoy the convenience of adjusting your home’s climate from anywhere, a smart thermostat is a practical investment.
However, many homeowners hesitate to upgrade because they’re unsure about the installation process, potential wiring complications, or hidden costs. The good news is that most smart thermostats can be installed with basic tools and a little patience, even if you’re not an experienced DIYer. This comprehensive, step-by-step guide will walk you through everything you need to know: from choosing the right model and gathering essential tools, to navigating wiring challenges, budgeting for the project, and ensuring long-term reliability. Let’s demystify the process and empower you to confidently upgrade your home’s comfort and efficiency.
Choosing the Right Smart Thermostat for Your Home
Compatibility with Your HVAC System
Before purchasing a smart thermostat, determine what type of heating and cooling system you have. Most homes use one of the following:
- Forced air furnaces (gas, electric, or oil)
- Heat pumps
- Boilers or radiant systems
Not all smart thermostats are compatible with every type of system. Check your system’s voltage (most smart thermostats work with low-voltage systems) and whether you have single-stage or multi-stage heating/cooling.
Key Features to Consider
- Wi-Fi connectivity for remote access
- Learning algorithms that adapt to your schedule
- Geofencing to automatically adjust temperature when you leave or arrive
- Integration with smart home platforms (Alexa, Google Assistant, Apple HomeKit)
- Energy usage reports for tracking and optimizing consumption
- Sensor support for monitoring temperatures in multiple rooms
Popular Models at a Glance
- Nest Learning Thermostat
- Ecobee SmartThermostat with Voice Control
- Honeywell Home T9 Smart Thermostat
- Emerson Sensi Touch
Compare compatibility, features, and price points before making your selection.
Budgeting for Your Smart Thermostat Project
Device Costs
The average price for a smart thermostat ranges from $100 to $250, depending on features and brand. Entry-level models offer basic scheduling and app control, while premium versions include advanced sensors, voice integration, and learning capabilities.
Additional Materials and Tools
- Screwdrivers (Phillips and flathead)
- Drill and drill bits (for new mounting holes, if needed)
- Wire labels or masking tape
- Level (for straight installation)
- Needle-nose pliers
- Voltage detector (optional but recommended for safety)
- Wall anchors (for drywall installation)
- C-wire adapter (if your system lacks a C-wire)
Depending on what you already own, expect to spend $15–$40 on tools and supplies.
Professional Installation (Optional)
If your wiring is complex or you’re uncomfortable with DIY installation, hiring a pro typically costs $100–$200. This can be worthwhile for peace of mind, especially in older homes.
Potential Hidden Costs
- Upgrading wiring (especially adding a C-wire)
- Wall repair or painting if your new thermostat is smaller than the old unit
- Additional sensors for room-by-room temperature control
Factor these into your budget to avoid surprises.
Preparation: What to Do Before You Begin
Check Existing Wiring
Remove your current thermostat’s faceplate and inspect the wires. Most smart thermostats require a C-wire (common wire) for power. If you see a C-wire (usually blue or black and labeled “C”), you’re set. If not, check your furnace control board—some HVAC systems have an unused C-wire you can connect. If a C-wire is truly absent, you may need a C-wire adapter (often included with higher-end thermostats) or professional help.
Turn Off Power
Shut off power to your HVAC system at the breaker panel to avoid electrical shock or system damage. Double-check by attempting to change the temperature on your old thermostat; the system should not respond.
Read the Manufacturer’s Instructions
Each thermostat is a little different. Review the included manual and app setup steps before starting your installation.
Step-by-Step Smart Thermostat Installation
1. Remove the Old Thermostat
- Pop off the faceplate of your existing thermostat.
- Take a clear photo of the wiring connections for reference.
- Label each wire with the supplied stickers or masking tape (e.g., Rh, Rc, W, Y, G, C).
- Unscrew the mounting plate and gently pull the wires through.
2. Prepare the Wall
- If needed, patch and paint any holes or wall damage from the previous thermostat.
- Mark the position for the new mounting plate using a level.
- Drill new holes and insert wall anchors if mounting on drywall.
3. Install the New Mounting Plate
- Thread the labeled wires through the new plate.
- Use a level to ensure the plate is straight.
- Screw the plate firmly into place.
4. Connect the Wires
- Insert each labeled wire into the corresponding terminal on the new thermostat. Refer to your photo and the manufacturer’s wiring diagram.
- Ensure connections are snug and no bare wire is exposed outside the terminal.
- If using a C-wire adapter, follow the included instructions carefully.
5. Attach the Thermostat Faceplate
- Snap the thermostat onto the mounting plate.
- Restore power at the breaker panel.
- The thermostat should power up and begin the guided setup process.
6. Configure the Thermostat
- Follow on-screen or in-app instructions to set up Wi-Fi, connect to your HVAC system, and personalize schedules.
- Test heating and cooling functions to confirm correct wiring.
- Download the manufacturer’s app for remote control and settings.
Troubleshooting Common Installation Issues
No Power to Thermostat
If the smart thermostat doesn’t power on, double-check the wiring—especially the C-wire connection. Confirm that the breaker is switched on, and that all wire ends are securely in their terminals. If you’re missing a C-wire, use the manufacturer’s adapter or seek professional help.
System Not Heating or Cooling
If your system won’t respond, check that each wire is in the correct terminal and that you’ve completed the setup process in the app. Refer to your pre-removal photo for wire placement. Some systems require a brief delay after power restoration.
Wi-Fi or App Problems
Ensure your home Wi-Fi is operating, and that the thermostat is within range. Restart your router and reinstall the app if needed. Most manufacturers offer online support and troubleshooting guides.
Best Practices for Smart Thermostat Maintenance
Software Updates
Enable automatic updates in the app to ensure your thermostat receives new features and security patches.
Cleaning and Care
- Gently dust the thermostat’s exterior with a dry cloth.
- Avoid using liquids or sprays directly on the device.
- Check for cobwebs or dust that might interfere with sensors.
Battery Replacement (if applicable)
Some models use backup batteries. Replace these annually, or as needed, to prevent data loss during power outages.
Review and Adjust Schedules
Periodically review your programmed schedule and preferences, especially after seasonal changes or family routine shifts. Use energy reports to optimize temperature settings and maximize savings.
Safety Checklist for DIY Installers
- Turn off power at the breaker before starting any work.
- Use a voltage detector to confirm wires are not live.
- Work in a well-lit area with dry hands.
- Do not force wires into terminals; if unsure, consult a professional.
- Keep small parts and tools away from children and pets.
Smart Thermostat Compliance and Warranty Considerations
Permits and Local Codes
In most areas, replacing a thermostat does not require a permit, but always check your local building codes, especially in multi-family or rental properties. If you’re in a historic home or condo, consult your HOA or building manager for approval.
Manufacturer Warranty
Register your device after installation to activate the manufacturer’s warranty. Take photos of your wiring and installation as proof of proper setup—this can be helpful if you need support or warranty service later.
Maximizing Efficiency with Your New Smart Thermostat
Utilize Advanced Features
- Set up geofencing to automatically adjust the temperature when you leave or arrive home.
- Enable eco or away modes for maximum energy savings.
- Integrate with voice assistants for hands-free control.
- Install additional sensors in high-use rooms for more accurate comfort.
Monitor and Adjust Energy Usage
Review monthly energy reports in your thermostat’s app. Use these insights to tweak schedules and temperature setpoints, reducing waste without sacrificing comfort.
Conclusion: Enjoying the Benefits of a Smart Thermostat
Upgrading to a smart thermostat is one of the most impactful home improvements you can make, delivering tangible benefits in comfort, convenience, and energy efficiency. With the right preparation, tools, and attention to detail, most homeowners can tackle this project in an afternoon. By following the step-by-step process outlined above—from choosing a compatible model and budgeting for necessary supplies, to handling wiring, setup, and troubleshooting—you’ll have the confidence to complete your installation safely and successfully.
Once your thermostat is up and running, take advantage of its powerful features. Experiment with schedules that match your family’s lifestyle, use energy reports to spot savings opportunities, and explore integrations with other smart home devices. Stay proactive about maintenance and software updates to ensure your investment continues to pay off for years to come. Whether you’re motivated by lower utility bills, sustainability, or simply the convenience of modern technology, a smart thermostat upgrade is a rewarding home improvement that punches far above its weight.
Remember: if you encounter any wiring complexities or uncertainties, don’t hesitate to consult a professional. A safe, reliable installation is always worth the extra care. Happy upgrading!
I’m interested in the energy usage reporting and learning features you described. In practice, how much do these actually help with reducing utility bills compared to traditional programmable thermostats?
Smart thermostats typically provide more detailed energy usage reports and can learn your habits to optimize heating and cooling. In practice, many users see additional savings of 10–15% on their utility bills compared to traditional programmable thermostats. The reporting features help you spot patterns and adjust settings, while learning algorithms automatically make small adjustments for efficiency, which adds up over time.
After picking out a model that fits my system, about how long does the entire installation process typically take for someone who hasn’t done thermostat wiring before?
For someone new to thermostat wiring, the complete installation process usually takes about 1.5 to 2 hours. This includes removing the old thermostat, carefully wiring the new one, mounting the device, and setting up the software or app if required. Allow extra time if your wiring needs labeling or you’re unfamiliar with your HVAC system.
The step-by-step approach is helpful, but about how much time should I set aside for the whole installation process from unboxing to testing the device? I like to plan projects carefully to avoid unexpected downtime.
You can expect the entire process, from unboxing to fully testing your smart thermostat, to take about 1 to 2 hours if you have the right tools and follow the steps carefully. This includes removing your old thermostat, wiring the new one, mounting, software setup, and testing. If you’re new to DIY electrical work, allow a bit more time to double-check each step.
I noticed some smart thermostats have features like geofencing and learning your schedule. If I live with roommates who have irregular routines, how well do these features actually work in multi-person homes?
In homes with multiple people and irregular routines, features like geofencing and schedule learning can be less accurate, since the thermostat might adjust settings based on just one person’s location or habits. Some smart thermostats let you connect multiple phones for geofencing, which helps track everyone’s comings and goings. For schedule learning, you may need to manually tweak settings or use manual modes to ensure comfort for everyone.
If my house uses an older boiler system for heating, are there specific smart thermostat models I should look for, or will most of them work as long as they mention low-voltage compatibility?
For homes with older boiler systems, it’s important to choose a smart thermostat that supports low-voltage (typically 24V) heating systems and has compatibility with boilers. While many smart thermostats mention low-voltage support, not all are designed for boiler controls, especially if your system uses only two wires. Look for models specifically listing compatibility with boilers or two-wire systems, as some require a C-wire or need an adapter.
If my old thermostat has only two wires, can I still upgrade to a smart thermostat, or will I need to rewire part of my system for it to work?
If your old thermostat has only two wires, many smart thermostats may not work properly because they often need a C-wire (common wire) for power. You may need to run an additional wire or use a C-wire adapter to provide the necessary power. Some smart thermostats are designed to work with two-wire systems, but options are more limited. Check the compatibility of your chosen model before purchasing.
I’m not totally clear on how to figure out if my heating system is low-voltage or not. Are there any easy ways to check this before I start shopping for a smart thermostat?
You can check if your heating system is low-voltage by looking at the wires connected to your current thermostat. Low-voltage systems typically use thin wires with colors like red, white, green, and yellow, and are often labeled with letters such as R, W, Y, and G. If your thermostat wires are thick, similar to regular electrical wires, or if they’re connected with wire nuts, you might have a line-voltage system, which isn’t usually compatible with most smart thermostats.
Remote access with a smartphone sounds super handy. Does that feature require a separate subscription or special app, or is it generally included in the price of the thermostat?
Most smart thermostats include remote access through a dedicated app at no extra cost—it’s typically part of the purchase. You’ll just need to download the manufacturer’s app onto your smartphone. Some brands offer optional premium features for a fee, but basic remote control and scheduling are usually included without a subscription.
The guide says the installation is doable for DIYers with basic tools. What are some signs during the wiring process that indicate I might need to call a professional instead of continuing on my own?
If you find frayed or damaged wires, unclear wire labeling, or wiring colors that don’t match your thermostat’s instructions, it’s a good idea to pause and consult a professional. Also, if you encounter exposed copper, unfamiliar voltage markings, or are unsure about safely turning off power, it’s safer to get expert help before proceeding.
The article mentions that most smart thermostats are compatible with low-voltage systems, but how can I tell for sure if my older forced air furnace qualifies? Are there any common issues to look out for with older wiring?
To check if your older forced air furnace is compatible, look for a thermostat that operates with 24V wiring, which is typical for low-voltage systems. Remove your current thermostat cover and see if you have thin wires labeled with letters like R, W, Y, G, or C. If you only have two wires and no C wire (common), you might need an adapter or a thermostat that works without it. Sometimes, older wiring can be brittle or lack labeling, so take care when handling and consider consulting a professional if you’re unsure.
My current HVAC system is a boiler with radiant heating. Are there specific brands or models of smart thermostats that work better with boilers, or are there extra challenges I should be aware of when installing in this type of setup?
Smart thermostats can work with boiler systems, but there are a few things to keep in mind. Look for models that specifically mention compatibility with boilers and two-wire systems, such as the Nest or ecobee. You might need a common wire (C-wire) or a power extender kit, as many boilers don’t provide constant power to the thermostat. Double-check your wiring and consult the manufacturer’s compatibility guide before purchasing to ensure a smooth installation.
If my current HVAC system is an older forced air furnace, are there any specific wiring issues or compatibility concerns I should watch out for before attempting to install a smart thermostat myself?
Older forced air furnaces can sometimes lack the C wire (common wire) needed to power most smart thermostats. Before starting, check if your existing thermostat wiring includes a C wire. If not, you may need to use a power extender kit or run a new wire from the furnace. Also, double-check your furnace’s voltage; smart thermostats usually work with low-voltage (24V) systems, not line-voltage. Reviewing your thermostat and furnace manuals can help clarify compatibility.
When considering potential wiring complications, how can I tell in advance if my setup is going to need extra work, like running a new C-wire, before I start buying tools or a thermostat?
To check if you’ll need extra wiring like a C-wire, turn off your HVAC power and remove the cover of your existing thermostat. Look for a terminal labeled ‘C’ with a wire attached. If there’s no wire connected to ‘C’, or if no ‘C’ terminal exists, you may need to run a new C-wire or use a compatible adapter before buying your thermostat or tools.
How long should I expect the installation to take if I’m a first-time DIYer following your step-by-step guide, and are there any steps that typically cause unexpected delays?
For a first-time DIYer, you should budget about 1.5 to 2.5 hours to install a smart thermostat using our guide. The steps that often cause unexpected delays include identifying and labeling the existing wires, especially if your wiring doesn’t match the guide exactly, and setting up the thermostat to connect with your Wi-Fi network. Make sure to turn off power at the breaker and take your time with the wiring for a smooth process.
If my HVAC system uses high voltage wiring rather than low voltage, does that mean I can’t install most smart thermostats mentioned here, or are there models specifically for high voltage setups?
Most smart thermostats covered in the article are designed for low-voltage (24V) HVAC systems, which are the most common in homes. If your system uses high voltage (typically 120V or 240V, often found with electric baseboard heaters), standard smart thermostats won’t work. However, there are smart thermostat models specifically made for high-voltage systems. You’ll want to look for units labeled as compatible with line voltage or electric baseboard heating.
In the section about budgeting for the project, does the overall cost estimate include any unexpected expenses like having to buy additional wiring adapters or a C wire power kit? I want to make sure I don’t run into surprise costs halfway through.
The cost estimates in the budgeting section mainly focus on standard installation materials and the smart thermostat itself. While it mentions factoring in some optional expenses, it does not specifically include unexpected costs like buying extra wiring adapters or a C wire power kit. It’s a good idea to check if your current wiring setup matches your new thermostat’s requirements and budget a bit more for these possible extras just in case.
If you hit an unexpected wiring complication mid-install, like finding extra wires not mentioned in the manual, what’s the best way to troubleshoot without risking damage to your HVAC system or the thermostat?
If you encounter unexpected wires, pause the installation and don’t make any guesses about connections. Take clear photos of your wiring setup and label each wire if possible. Refer to your thermostat’s advanced wiring diagrams, and consult your HVAC system’s manual. When unsure, it’s safest to contact the thermostat manufacturer’s support or a licensed HVAC technician before proceeding to avoid causing damage.
Once the installation is complete, are there steps I should take to make sure the system keeps running reliably over time, or any maintenance tips unique to smart thermostats?
Once your smart thermostat is installed, it’s a good idea to periodically check for firmware updates through its app, as these can improve performance and security. Make sure the thermostat stays connected to Wi-Fi, and replace or clean any sensors or filters recommended by your HVAC system’s manual. Also, check the thermostat’s battery status if it uses batteries, and gently clean the device to prevent dust buildup on sensors.
You mention the importance of choosing a model that fits my heating and cooling system. Are there any major differences in features or performance between smart thermostats designed for heat pump systems versus those meant for forced-air furnaces?
Yes, there are some key differences. Smart thermostats for heat pump systems often include special features like auxiliary or emergency heat controls, which are important for efficient operation in colder weather. Models for forced-air furnaces typically don’t need these options. It’s important to match the thermostat to your system type to ensure correct wiring, compatibility, and to access all the right features for your heating and cooling setup.
When budgeting for a smart thermostat installation, what hidden costs should I watch out for beyond just the device and basic tools? For example, are there usually extra expenses related to wiring or adapters?
When budgeting for a smart thermostat, you might encounter extra costs like hiring a professional if your wiring is complex or outdated. Some older systems lack a C-wire (common wire), which could mean buying a power adapter or having an electrician add new wiring. Other possible expenses include patching or repainting walls after removing the old thermostat or upgrading your HVAC system if it’s incompatible.
About how much time should I set aside for the installation process, from turning off the power to finishing setup? I’ll need to find a window between kids’ activities and work calls.
You should plan to set aside about 1 to 2 hours for the entire smart thermostat installation process, from shutting off the power to completing the setup. If you’re already comfortable with basic wiring and following instructions, you might finish closer to the one-hour mark. Make sure you also allow a little extra time for downloading any apps and configuring Wi-Fi.
Could you elaborate on common wiring complications that someone might encounter during installation, and whether hiring a professional is usually needed if your home has a boiler or radiant system?
When installing a smart thermostat in homes with boilers or radiant systems, wiring can get tricky. You might encounter issues like the absence of a C-wire (common wire), incompatible voltage (line voltage systems), or multiple zones requiring special adapters. These setups often differ from standard forced-air systems. In such cases, hiring a professional is usually recommended to ensure correct and safe installation, especially to avoid damaging your heating system or the new thermostat.
How long does the typical installation take for someone who isn’t very experienced with DIY projects? Is it realistic to finish in an afternoon, or should I plan for a whole weekend?
For someone without much DIY experience, installing a smart thermostat usually takes about 2 to 4 hours, assuming you follow the guide carefully and don’t run into unexpected wiring issues. Most people can finish in an afternoon, but if your system is older or the wiring seems confusing, it’s wise to allow extra time or spread the project over a weekend just in case.
After installation, how much time should I set aside for setup and calibration so the smart thermostat can actually ‘learn’ my schedule or preferences? Are there best practices for accelerating this learning process?
After installation, you should expect to spend about 30–60 minutes on the initial setup, entering your schedule, preferences, and connecting to Wi-Fi. The ‘learning’ phase, where the thermostat adapts to your habits, usually takes about a week. To speed up learning, manually adjust temperatures as you would normally and consistently use the thermostat’s app or interface to set your desired comfort levels. Providing a detailed initial schedule also helps the thermostat adapt more quickly.
Could you clarify what ‘multi-stage heating/cooling’ means and how I can tell if that’s what we have in our building before picking a smart thermostat?
Multi-stage heating or cooling means your system can adjust its output in steps—for example, low and high modes—instead of just turning fully on or off. To check if you have this, look at your thermostat’s wiring: if there are wires connected to terminals labeled W2, Y2, or similar, you likely have a multi-stage system. This information helps ensure you choose a compatible smart thermostat.
Our HVAC system is a bit older and uses a boiler for heating. Are there particular smart thermostat brands or models you would recommend for compatibility with boiler or radiant systems?
For homes with boiler or radiant heating, it’s important to choose a smart thermostat that works with two-wire or hydronic systems. Brands like ecobee (especially the ecobee SmartThermostat) and some Honeywell models, such as the Honeywell Home T6 Pro, are known for their compatibility with boilers. Always check for compatibility with your exact wiring setup before purchasing, as some systems may need a power adapter or professional installation.
When it comes to budgeting for this project, what hidden costs should I watch out for? I’ve heard about possible extra wiring or professional installation fees—are those common even if the article says basic tools are usually enough?
You’re right to consider possible extra costs. While many installations are straightforward, hidden expenses can include the need for a C-wire (common wire) if your current setup doesn’t have one, which may require extra wiring or an adapter. If your HVAC system is older or complex, you might need a professional’s help, which adds labor fees. Also, check if your thermostat brand requires specific mounting plates or additional equipment not included in the box.
I saw that geofencing and learning features are important to consider. For someone who has employees frequently coming and going, which feature would save more on energy bills?
For a workplace with employees coming and going at different times, geofencing is usually more effective for saving energy. It automatically adjusts the thermostat when people leave or arrive, so you’re not heating or cooling an empty space. Learning features are great too, but geofencing is particularly useful for unpredictable schedules.
You mention that most smart thermostats work with low-voltage systems, but how can I check if my current wiring supports this without hiring an electrician first?
To check if your system supports a smart thermostat, turn off the power to your current thermostat and remove the cover. Look for thin, multi-colored wires (usually 18-gauge) connected to screw terminals labeled with letters like R, W, Y, or C. If you see these, it’s likely a low-voltage system. High-voltage systems usually have thick wires connected with wire nuts and often carry 120 or 240 volts.
How much time should I set aside for the installation if I’ve never done any electrical work before? The article says you can do it with basic tools, but I’m nervous about messing up the wiring.
If this is your first time working with thermostat wiring, it’s a good idea to set aside about two to three hours for the installation. This gives you plenty of time to carefully follow each step, double-check your wiring, and avoid rushing. If you run into any confusion or feel unsure, you can always pause and seek help. Safety comes first—be sure to turn off power at the breaker before starting.
If my HVAC system is multi-stage and I’m not very experienced with wiring, how much extra time should I set aside for installation, and are there common mistakes I should watch for?
For a multi-stage HVAC system and limited wiring experience, you might want to set aside 2–3 hours instead of the typical 1 hour, as identifying and correctly connecting multiple wires can take longer. Double-check your wiring labels and thermostat instructions—mislabeling wires and poor connections are common mistakes. Take photos of your original wiring before starting, and don’t rush the setup process.
When figuring out if my existing HVAC system is compatible, how can I tell for sure whether I have a single-stage or multi-stage setup? The article mentions this as important, but is there a specific place I should look or a test I can do before buying a thermostat?
To check if your HVAC system is single-stage or multi-stage, look at the wires connected to your current thermostat. Typically, a single-stage system will have one wire labeled ‘W’ (for heating) and possibly one ‘Y’ (for cooling), while multi-stage systems often have additional wires labeled ‘W2’ or ‘Y2’. You can also check your HVAC unit’s model number or manual for details about stages, or contact the manufacturer with your unit’s information.
If my HVAC system is an older boiler setup, how can I check if it’s low voltage and actually compatible with the newer smart thermostats mentioned? Are there specific brands that work better with boiler or radiant systems?
To check if your older boiler system is low voltage, look at the thermostat wires: low voltage systems usually use thin wires (like doorbell wire) and often connect to screw terminals labeled R, W, C, etc. High voltage systems use thicker wires and are usually wire-nutted together. For compatibility, many smart thermostats (such as ecobee and some Nest models) support boilers and radiant systems, especially if you have a C wire or use their power adapters. Always confirm with the thermostat’s compatibility tool before buying.
If I’m not sure whether my HVAC system is single-stage or multi-stage, what’s the easiest way for a beginner to figure that out before choosing a smart thermostat? Are there visual clues or is it only on the manual or label?
You can usually check your HVAC system by looking at the wiring connected to your current thermostat. If there’s just a single wire going to the W terminal, it’s likely single-stage. If you see wires labeled W1 and W2, or Y1 and Y2, you probably have a multi-stage system. If you’re still unsure, check your system’s manual or model number for details.
I’m thinking about upgrading, but I’m concerned about hidden costs. Could you give some examples of unexpected expenses that homeowners commonly run into when installing a smart thermostat themselves?
Some common unexpected expenses include needing a C-wire adapter if your existing wiring doesn’t support your new thermostat, having to buy extra tools like a voltage tester, or patching and painting the wall if the new thermostat is a different size. In older homes, you might also discover wiring issues that require an electrician. It’s wise to budget a little extra for these potential surprises.
For someone who’s not experienced with electrical work, what are the biggest challenges during installation, especially with the wiring? Are there any best practices for making sure I don’t accidentally damage anything or mess up my system?
One of the biggest challenges for beginners is correctly identifying and connecting the thermostat wires, especially since older systems may use non-standard wiring or lack a common (C) wire. To avoid mistakes, always turn off power at the breaker before starting, label each wire as you disconnect them from your old thermostat, and take a clear photo for reference. If you encounter confusing or damaged wires, consult your thermostat’s manual or consider calling a professional to ensure your HVAC system isn’t damaged.
The article talked about features like geofencing and energy usage reports—do those features require any kind of subscription, or are they usually included once you install the thermostat?
Most smart thermostats include features like geofencing and basic energy usage reports without requiring a subscription. However, some brands may offer advanced reports or additional smart features as part of a premium subscription service. It’s a good idea to check the specific model’s details before purchasing to see what’s included for free and what might require a paid plan.
If my HVAC system is single-stage heating only but I’m thinking of upgrading to central air in the near future, should I be looking for a smart thermostat that works with multi-stage systems right away, or is it easy to upgrade the thermostat later?
If you plan to add central air soon, it’s a good idea to choose a smart thermostat now that supports both single-stage and multi-stage systems. This way, you won’t have to replace the thermostat later or rewire things twice. Many smart thermostats are compatible with both types, so check the specs before buying.
If my heating and cooling system is multi-stage, do I have to buy a specific type of smart thermostat, or do most modern models handle that automatically? Would appreciate some real-world advice based on your experience.
For a multi-stage heating and cooling system, it’s important to check that the smart thermostat you choose is designed to support multi-stage configurations. Many modern models do support this, but not all, so always review the product specs—look for mentions of 2-stage or multi-stage compatibility. From my experience, models like the ecobee and higher-end Nest versions work well with these systems, but you may need to double-check your wiring and possibly use a compatibility checker on the manufacturer’s website before purchase.
For a business aiming to minimize downtime, how long does the typical installation take from start to finish if we’ve never installed a thermostat before? Any tips for a smoother process?
For first-time installers, plan for about 1 to 2 hours to complete a smart thermostat installation, including setup and testing. To keep downtime minimal, gather all the recommended tools beforehand, label wires as you disconnect the old thermostat, and confirm compatibility with your HVAC system. Scheduling installation outside of peak business hours can also help avoid disrupting operations.
I have an older forced air furnace and I’m not sure how to figure out if it’s considered low-voltage or not. Is there an easy way to check this before I go ahead and buy a smart thermostat?
You can check if your furnace is low-voltage by looking at the wires connected to your current thermostat. Low-voltage systems usually have thin wires, often in different colors, and are connected to small screw terminals labeled R, W, Y, G, or C. High-voltage systems use thick wires, sometimes wire-nutted together, often labeled 120V or 240V. If you see thin wires and 24V listed anywhere, it’s likely low-voltage and compatible with most smart thermostats.
You mention budgeting for the project, but do you have any tips on how to estimate the total cost, including any hidden expenses like extra wiring or adapters I might need for older homes?
To estimate your total smart thermostat installation cost, start with the price of the thermostat itself, then check if your current wiring is compatible—older homes may require a C-wire adapter or extra wiring, which can add to the cost. Also, budget for basic tools if you don’t already have them, and consider potential fees for professional installation if the wiring seems complex. Reviewing your current setup before purchase can help minimize surprises.
Could you elaborate on what kinds of hidden costs might come up during installation? For example, are there common extra parts or upgrades needed that people often overlook when budgeting?
Some hidden costs that can come up during smart thermostat installation include needing a C-wire adapter if your existing wiring doesn’t support your new thermostat. You might also need a new wall plate to cover old marks or holes, and sometimes professional help is required if your HVAC system is complex. In older homes, unexpected electrical or compatibility issues might mean added expenses for new wiring or upgraded control boards.
For someone with no experience doing electrical work, about how long should I expect the installation process to take from start to finish, including setup and testing? Is this something that can be done in an afternoon?
If you’re new to electrical work, installing a smart thermostat can usually be done in about 2 to 4 hours, including setup and testing. This makes it a reasonable afternoon project for most beginners. Be sure to follow each step carefully and allow extra time if you run into anything unfamiliar, especially with wiring. If you feel unsure at any point, it’s always a good idea to consult the manual or ask for help.
If I have a boiler system with radiant heat rather than forced air, are there specific brands or models of smart thermostats you would recommend, or will most major brands work with radiant setups?
Most major smart thermostat brands, like Nest, ecobee, and Honeywell, do offer models that can work with boiler systems and radiant heat. However, compatibility depends on your wiring and whether your system uses line voltage or low voltage. Look for models specifically labeled compatible with boilers or hydronic systems. Double-check the product specifications and, if you have any doubt, consult the manufacturer’s compatibility guides before purchasing.
The article mentions budgeting for the project—could you give an estimate of hidden costs, like professional installation or additional wiring, that might come up after I purchase the thermostat?
Certainly! After purchasing your smart thermostat, hidden costs can include professional installation, which can range from $100 to $250 depending on your location and system complexity. If your wiring isn’t compatible, hiring an electrician to run a new C-wire may cost an additional $100 to $200. Sometimes, you might also need a new mounting plate or adapters, which could add $10 to $30 more.
How long does the whole installation process usually take for someone without previous experience, and are there any steps in the guide that tend to take longer than expected?
For someone without previous experience, installing a smart thermostat typically takes about 1 to 2 hours. The steps that often take longer are identifying and labeling the existing wiring, as well as configuring the thermostat’s settings after installation. Taking your time with wiring—double-checking the connections—helps avoid issues later on. If your system requires a C-wire adapter, that can also add extra time.
The guide talks about budgeting for the project, but I’m a little concerned about hidden costs that might pop up during installation, like needing extra wiring or hiring an electrician. Can you give an idea of what unexpected expenses homeowners commonly encounter when switching to a smart thermostat?
Homeowners sometimes find that their existing wiring doesn’t support their new smart thermostat, especially if there’s no common (C) wire, which may require an adapter or professional installation. You might also need to patch or paint the wall if the new unit is a different size. In some cases, hiring an electrician becomes necessary if the wiring is outdated or complicated, leading to extra labor costs. It’s wise to set aside a little extra in your budget for these potential surprises.
The guide mentions tools, but is there a recommended list of the absolute essentials for installation? I’m not super handy, so I want to make sure I have everything before I get started.
Absolutely, having the essentials ready makes things much smoother. For most smart thermostat installations, you’ll need a flathead and Phillips screwdriver, a drill (if new holes are needed), a wire stripper, and a voltage tester to ensure your power is off. It’s also handy to have a pencil for marking holes and some painter’s tape to label wires as you disconnect them.
For someone who isn’t a confident DIYer, are there any smart thermostat models that are easier to install than others, especially for systems with multi-stage heating and cooling?
Yes, some smart thermostat models are designed to be easier for beginners, even with multi-stage systems. The Google Nest Learning Thermostat and ecobee SmartThermostat both offer clear instructions, labeled wiring bases, and helpful setup apps. They often come with compatibility checkers and detailed manuals to guide you through multi-stage wiring. If you’re still unsure, many brands also offer professional installation services for added peace of mind.
You mention potential hidden costs in the installation process—can you break down what unexpected expenses homeowners commonly run into, aside from the cost of the thermostat itself?
Certainly! Some common unexpected expenses include needing a C-wire adapter if your current system doesn’t have the required wiring, hiring a professional if DIY wiring proves challenging, repairing wall damage from removing the old thermostat, and updating outdated HVAC components. Sometimes, homeowners also encounter the need for new mounting plates or faceplate covers to fit the new device, which can add to the overall cost.
Could you clarify how to determine if my current HVAC system is single-stage or multi-stage before buying a smart thermostat? I’m not sure what to look for on my existing setup.
To check if your HVAC system is single-stage or multi-stage, look at the wiring connected to your current thermostat. If you see one wire labeled ‘W’ (for heating) and one ‘Y’ (for cooling), it’s usually single-stage. If you see wires labeled ‘W1’ and ‘W2’ (for heating) or ‘Y1’ and ‘Y2’ (for cooling), it’s likely multi-stage. You can also check your HVAC unit’s model number and reference its manual for staging details.
You said some homeowners are worried about wiring complications. What is the most common wiring challenge someone might run into, and how can I prepare for it before I even start the installation?
One of the most common wiring challenges is not having a C-wire (common wire), which many smart thermostats need for continuous power. Before you start, remove your old thermostat cover to check if a C-wire is present. If it isn’t, research your options—some thermostats offer power adapters or alternative wiring methods. Knowing your wiring setup in advance helps you choose the right thermostat and avoid surprises during installation.
When you talk about learning algorithms and geofencing, have you noticed any brands that really excel in adapting quickly to your schedule, or is that feature pretty similar across most smart thermostats?
Some brands stand out when it comes to adaptive learning and geofencing. For example, the Nest Learning Thermostat is known for quickly recognizing your schedule and making automatic adjustments. Ecobee thermostats also offer strong geofencing features, especially with multiple users. While many smart thermostats now include these capabilities, the speed and accuracy of adaptation can vary, with Nest and Ecobee generally leading the pack.
Once you get the smart thermostat up and running, are there typical maintenance steps or reliability issues to watch for, particularly in older homes or during extreme weather?
After installing a smart thermostat, it’s a good idea to periodically check for software updates and ensure the Wi-Fi connection is stable, especially in older homes where wiring or network coverage can be inconsistent. In extreme weather, make sure the thermostat is reading temperatures accurately and that your HVAC system isn’t overworking. Also, occasionally clean the thermostat’s sensors and verify the wiring connections remain secure over time.
Could you clarify how to determine whether my system is single-stage or multi-stage? I see that’s important for compatibility, but I’m not sure what to look for on my existing thermostat or HVAC unit.
To check if your system is single-stage or multi-stage, start by looking at your current thermostat wiring. If you see only one wire labeled ‘W’ (for heat) and one ‘Y’ (for cool), it’s likely single-stage. Multi-stage systems usually have wires labeled W1 and W2 (for two-stage heating) or Y1 and Y2 (for two-stage cooling). You can also check your HVAC unit’s manual or model number for more details.
You mention budgeting for the project, but can you give a ballpark figure for the total installation cost if I hire a professional versus doing it myself? I’d like to plan ahead for my small business’s expenses.
If you install the smart thermostat yourself, expect to spend between $100 and $300, mainly for the thermostat and any basic tools you might need. Hiring a professional typically costs between $300 and $600, which includes labor and sometimes the thermostat itself. Prices can vary depending on your location and the complexity of your existing HVAC system.
Are there any particular wiring complications small business owners should watch out for if our building uses a boiler system, rather than the more common forced air setup you mentioned?
Yes, boiler systems often use different wiring than forced air systems. Many boilers have only two wires for simple heat control, but some smart thermostats require a C-wire (common wire) for power. You may need an adapter or professional help if a C-wire is missing. Also, check if your thermostat supports multi-stage heating or separate zone controls, which are common in commercial boiler setups.
I’m a little nervous about the wiring part since I’ve never worked with electrical stuff before. Are there any specific mistakes or common issues that first-time DIYers run into when installing a smart thermostat?
It’s completely normal to feel nervous about wiring, especially if it’s your first time. Common mistakes include not turning off the power at the breaker, mislabeling or mixing up wires, and forgetting to use the correct terminals. Some people also don’t check if their system is compatible with the new thermostat. Double-check each step, label wires as you remove them, and take clear photos before disconnecting anything. If you ever feel unsure, consulting a professional is the safest route.
Could you explain a bit more about how to determine if my HVAC system is single-stage or multi-stage, and why that matters when choosing a thermostat?
To check if your HVAC system is single-stage or multi-stage, look at the wiring on your current thermostat. Single-stage systems typically have one wire labeled W (for heating) and/or Y (for cooling), while multi-stage systems have W1/W2 or Y1/Y2 indicating multiple heating or cooling stages. This matters because multi-stage thermostats can control those extra stages for better comfort and efficiency, while a single-stage thermostat can’t.
Can you explain more about what sort of wiring complications a novice might face, especially if the existing thermostat wiring doesn’t match the instructions provided with a smart thermostat?
A common wiring complication is the absence of a C-wire (common wire), which many smart thermostats require for power. Older systems might have different wire colors or fewer wires than expected. Sometimes, extra wires are hidden in the wall or connected to terminals with different labels. If your existing wiring doesn’t match the new thermostat’s instructions, carefully note each wire’s original terminal before disconnecting and consult the HVAC system’s manual. When in doubt, contacting a professional is safest to avoid damaging your system.
You mentioned budgeting for the project—can you break down the total cost, including hidden expenses like additional wiring or adapters? I’m trying to make sure I won’t run into any surprises once I start installing.
Here’s a breakdown to help you plan: The smart thermostat itself usually costs between $100 and $250. If your HVAC system needs a C-wire or adapter, expect an extra $15 to $40. Basic tools may add $20 to $40 if you don’t already have them. Professional installation, if needed, typically runs $100 to $200. Minor wiring upgrades can add $50 to $100. This means your total could range from $135 to $590, depending on your situation.
The guide mentions features like learning algorithms and geofencing. If I’m mainly interested in reducing utility bills, which features would provide the most savings compared to a standard programmable thermostat?
If your main goal is reducing utility bills, features like learning algorithms and geofencing can help more than a standard programmable thermostat. Learning algorithms adapt to your habits and automatically optimize temperature settings, while geofencing adjusts heating or cooling based on whether anyone is home. These functions minimize energy use more effectively than fixed schedules, often leading to greater savings.
You mention compatibility with different HVAC systems—what’s the best way to determine if my current system (it’s an oil-fired furnace) will work before I order anything?
To check compatibility with your oil-fired furnace, start by noting your current thermostat’s wiring setup, especially the number and labels of wires connected. Most smart thermostats list compatible systems on their packaging or websites. Look for oil-fired or ‘furnace’ support in the specs. If you’re unsure, manufacturers often offer online compatibility checkers—enter your wire labels there for a clear answer.
You mention budgeting for the project—could you break down the typical hidden costs that pop up with smart thermostat installations, especially for someone who hasn’t done much DIY electrical work before?
Unexpected costs often include purchasing extra wire connectors, a C-wire adapter if your system lacks a common wire, or a new wall plate to cover any gaps. You may also need to buy specialized tools like a voltage tester or small screwdrivers if you don’t already own them. If you run into wiring issues, hiring a professional for troubleshooting can add to your total costs.
After installing the smart thermostat following these steps, what’s the best way to test and make sure all heating and cooling features are working properly before I fully rely on it? Are there common mistakes DIYers run into at this stage?
Once your smart thermostat is installed, set it to both heating and cooling modes and adjust the temperature above and below the current room temperature to trigger your system. Confirm that your furnace and AC respond as expected. Let each system run for a few minutes to ensure proper cycling. Common mistakes include miswiring, skipping breaker checks, or not securely attaching wires, which can cause the system to be unresponsive. Double-check wire connections and your thermostat’s setup menu if issues arise.
Could you explain a bit more about the wiring challenges mentioned in the guide? I’m not very handy and nervous about making a mistake. How can I tell if my existing wiring will be an issue before I start the installation?
Wiring challenges often come from older homes lacking a common (C) wire, which many smart thermostats need for power. Before starting, turn off your HVAC system and remove your current thermostat’s cover. Check if there is a wire labeled ‘C’ connected to the terminal. If not, or if you see fewer than four wires, you might need an adapter or professional help. If you’re unsure, taking a photo of the wiring and consulting the thermostat’s manual or a technician is a safe approach.
After installing a smart thermostat as described, how long should it take for the device’s learning algorithms to adapt to our household schedule and start making noticeable energy-saving adjustments?
Most smart thermostats start learning your household’s schedule within the first week, but it can take about 2 to 4 weeks for the algorithms to fully adapt and begin making noticeable energy-saving adjustments. The more consistently you use the thermostat and provide input (like manual adjustments or using the app), the faster it will optimize its settings for your routine.
How long does the typical installation take for someone who doesn’t have a lot of DIY experience, and are there any steps that usually end up taking longer than expected?
For someone with limited DIY experience, installing a smart thermostat usually takes about 1.5 to 3 hours. The steps that often take longer are identifying and labeling the existing wires correctly and troubleshooting the wiring if your home’s setup is older or doesn’t match the instructions. Double-checking compatibility and safely turning off power at the breaker can also add time, but help avoid mistakes.
You mentioned that most smart thermostats can be installed with basic tools at home, but how do I know if my current wiring setup is compatible before I actually buy one? Are there signs I should look for?
To check if your wiring is compatible, remove your old thermostat’s cover and look for a C-wire (common wire), which many smart thermostats require. Take note of how many and which wires are connected—typically labeled as R, W, Y, G, and sometimes C. Snap a photo of the wiring and compare it to the compatibility info provided by the smart thermostat manufacturer before purchasing.
I noticed you mentioned low-voltage systems. Are there any troubleshooting tips if I find my current thermostat only has two wires and no C-wire? Will that limit the smart thermostat models I can pick from?
If your current thermostat only has two wires and lacks a C-wire, it likely controls a simple heating system and doesn’t provide constant power required by many smart thermostats. Some models can work without a C-wire or include adapters to create one, but not all do. Double-check compatibility before buying, and consider a professional installation or a power extender kit if needed.
Can you give any tips on what first-time mistakes to avoid during wiring, especially for someone with a heat pump or a multi-stage system? I’m a little nervous about getting the connections wrong.
Double-check your system type before starting, as heat pumps and multi-stage systems often have more wires and unique terminal labels. Take a clear photo of your old thermostat’s wiring before disconnecting anything. Use the thermostat’s compatibility checker and labeling stickers if included. Don’t rely on wire color alone—match each wire to its terminal label. If you’re unsure, consult the thermostat manual or an HVAC professional to avoid damaging your system.
I’m not super experienced with wiring. If I run into trouble during the installation, what’s the best way to get help without having to call a professional right away?
If you get stuck during installation, check the smart thermostat manufacturer’s website for troubleshooting guides and videos, as many brands offer step-by-step support. You can also look for online forums or community groups where people share tips and solutions. If your thermostat has a customer support line or chat, reaching out can provide real-time help. Having clear photos of your wiring setup can make it easier to get precise advice if you decide to post questions online.
If someone wanted to handle this as a weekend DIY project, about how much time should they set aside for installation, including troubleshooting any minor wiring hiccups? Is this still a reasonable timeline for a first-timer?
For a first-time DIYer, setting aside about 2 to 4 hours should be enough to install a smart thermostat, including time for minor troubleshooting. The actual installation often takes 1 to 2 hours, but giving yourself extra time helps if you encounter unexpected wiring questions or need to consult the manual. For most beginners, completing the project in a single afternoon is definitely reasonable.
The article mentions checking if my HVAC system uses low-voltage wiring before choosing a smart thermostat. If my system turns out to be high-voltage, are there any safe workarounds or smart thermostat options available for that setup?
If your HVAC system uses high-voltage (typically 120V or 240V) wiring, standard smart thermostats designed for low-voltage systems aren’t compatible. However, there are smart thermostats specifically made for high-voltage systems, often called line-voltage smart thermostats. Make sure to look for models that clearly state support for high-voltage or electric baseboard heating. Never try to adapt a low-voltage thermostat to a high-voltage system, as that’s a safety risk.
Could you expand a bit more on hidden costs? For budgeting purposes, are there any common extra expenses (like unexpected wiring adapters or professional help) that people often overlook when switching to a smart thermostat?
When budgeting for a smart thermostat, remember that unexpected costs can come up. Common extra expenses include needing a C-wire adapter if your wiring is outdated, or hiring an electrician if installation gets tricky. Older homes may need additional wiring upgrades, and sometimes a new wall plate is required to cover the space left by the old thermostat. These costs can add up, so it’s wise to set aside a little extra in your budget.
I noticed the article touches on budgeting, but do the costs typically vary depending on the type of HVAC system you have, or should I expect a standard price for most installs?
The installation costs can definitely vary depending on your HVAC system type. For example, if you have a more complex system like multi-stage heating or older wiring, installation may take more time and possibly require extra parts or professional help, which adds to the cost. Standard single-stage systems with modern wiring are usually more straightforward and less expensive to install.
Could you elaborate on the potential hidden costs mentioned in the introduction? Besides the thermostat itself, what extra expenses should someone budget for, such as wiring adapters or professional installation?
Certainly! Beyond the smart thermostat itself, you might encounter extra costs like purchasing a C-wire adapter if your current wiring is incompatible. Some older homes may also require updated wiring or a new mounting plate. Professional installation is another potential expense, especially if you’re not comfortable with electrical work—fees vary based on your location and the job’s complexity.
I have a heat pump system and I’m trying to figure out which smart thermostat models are actually compatible. Does the guide break down the best options for different HVAC types, or do I need to contact the manufacturer directly for that info?
The guide covers general compatibility considerations and points out that not all smart thermostats work with heat pump systems. However, it doesn’t list specific models for each HVAC type. For your heat pump, it’s safest to check the specifications on the thermostat’s product page or contact the manufacturer directly to confirm compatibility.
For small businesses trying to maximize energy savings, do certain smart thermostat models provide more detailed energy usage reports than others? How important is this feature if I want to track utility costs closely?
Yes, some smart thermostat models offer much more advanced energy usage reports than others. Brands like Ecobee and Nest typically provide detailed breakdowns of heating and cooling patterns, usage history, and estimated savings. If tracking utility costs is important for your business, choosing a model with robust reporting features can be extremely valuable. It allows you to spot trends, identify inefficiencies, and make informed decisions that directly impact your energy expenses.